Monday, December 30, 2019

Up the Hill -- Track and Wiring

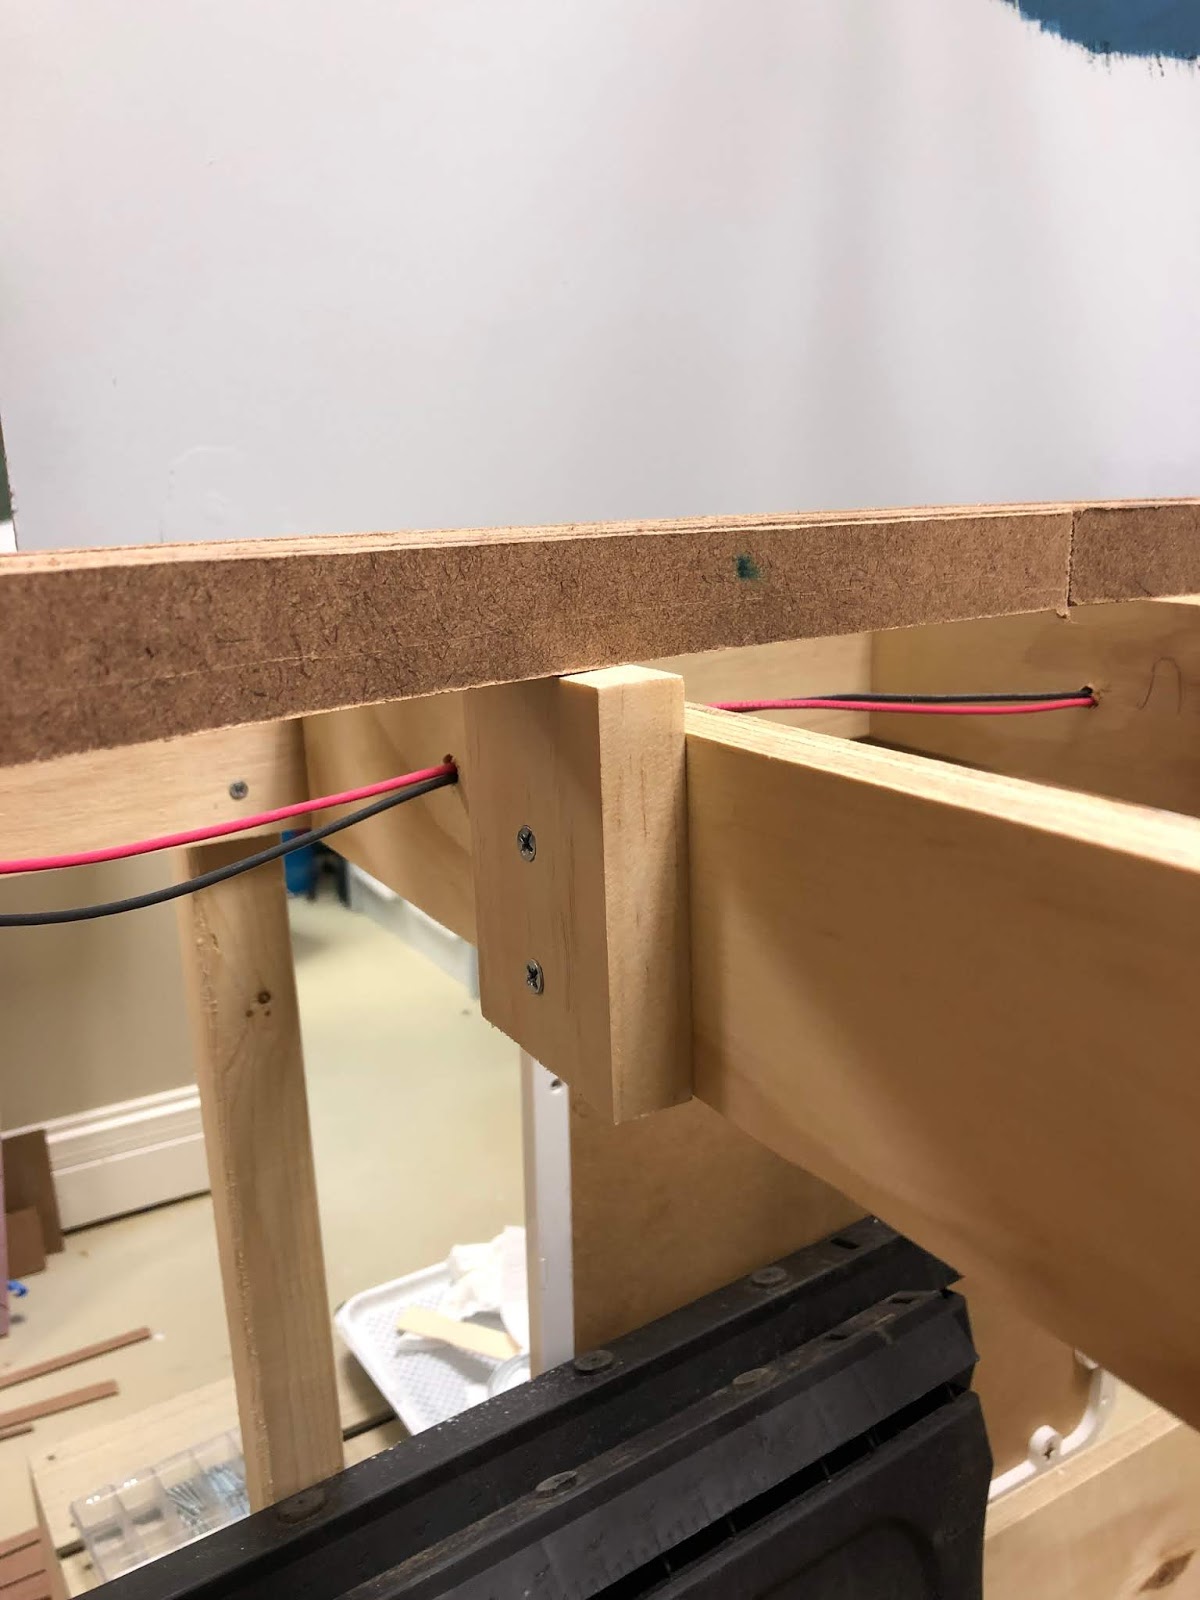
After the spline roadbed had been installed and secured, I moved to installing track on the mainline from Wicopee (top of the helix) to just short of the summit of the climb. I use Micro Engineering code 83 flextrack and Fasttracks #6 turnouts for my turnouts. I had built the turnouts previously which sped up the track laying process considerably. Additionally I had "pre-wired" the entire upper deck, making installation of feeders and supplying power to the track a faster process. 


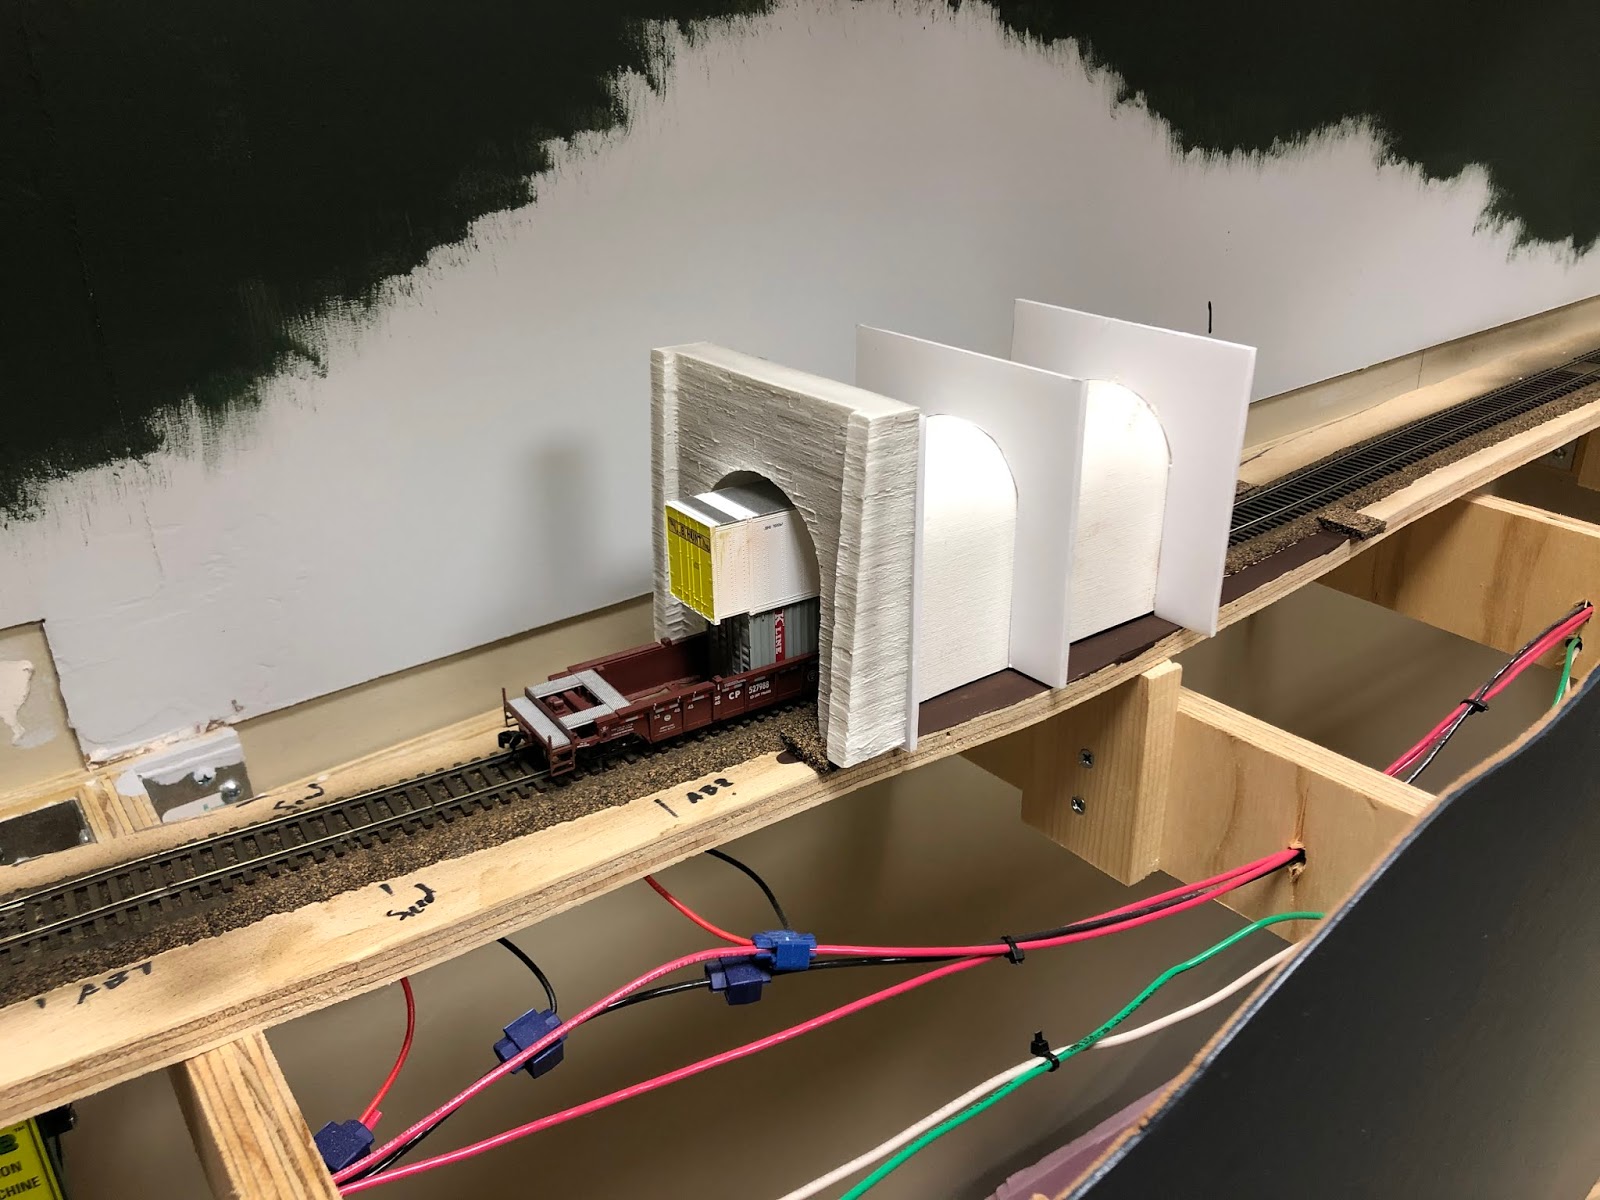
Above: Trackwork installed at the turnback at the top of the helix. Two tunnels in this scene will hide the tighter radius. Additional fascia work to come soon to give this scene at the entrance a much more presentable look.


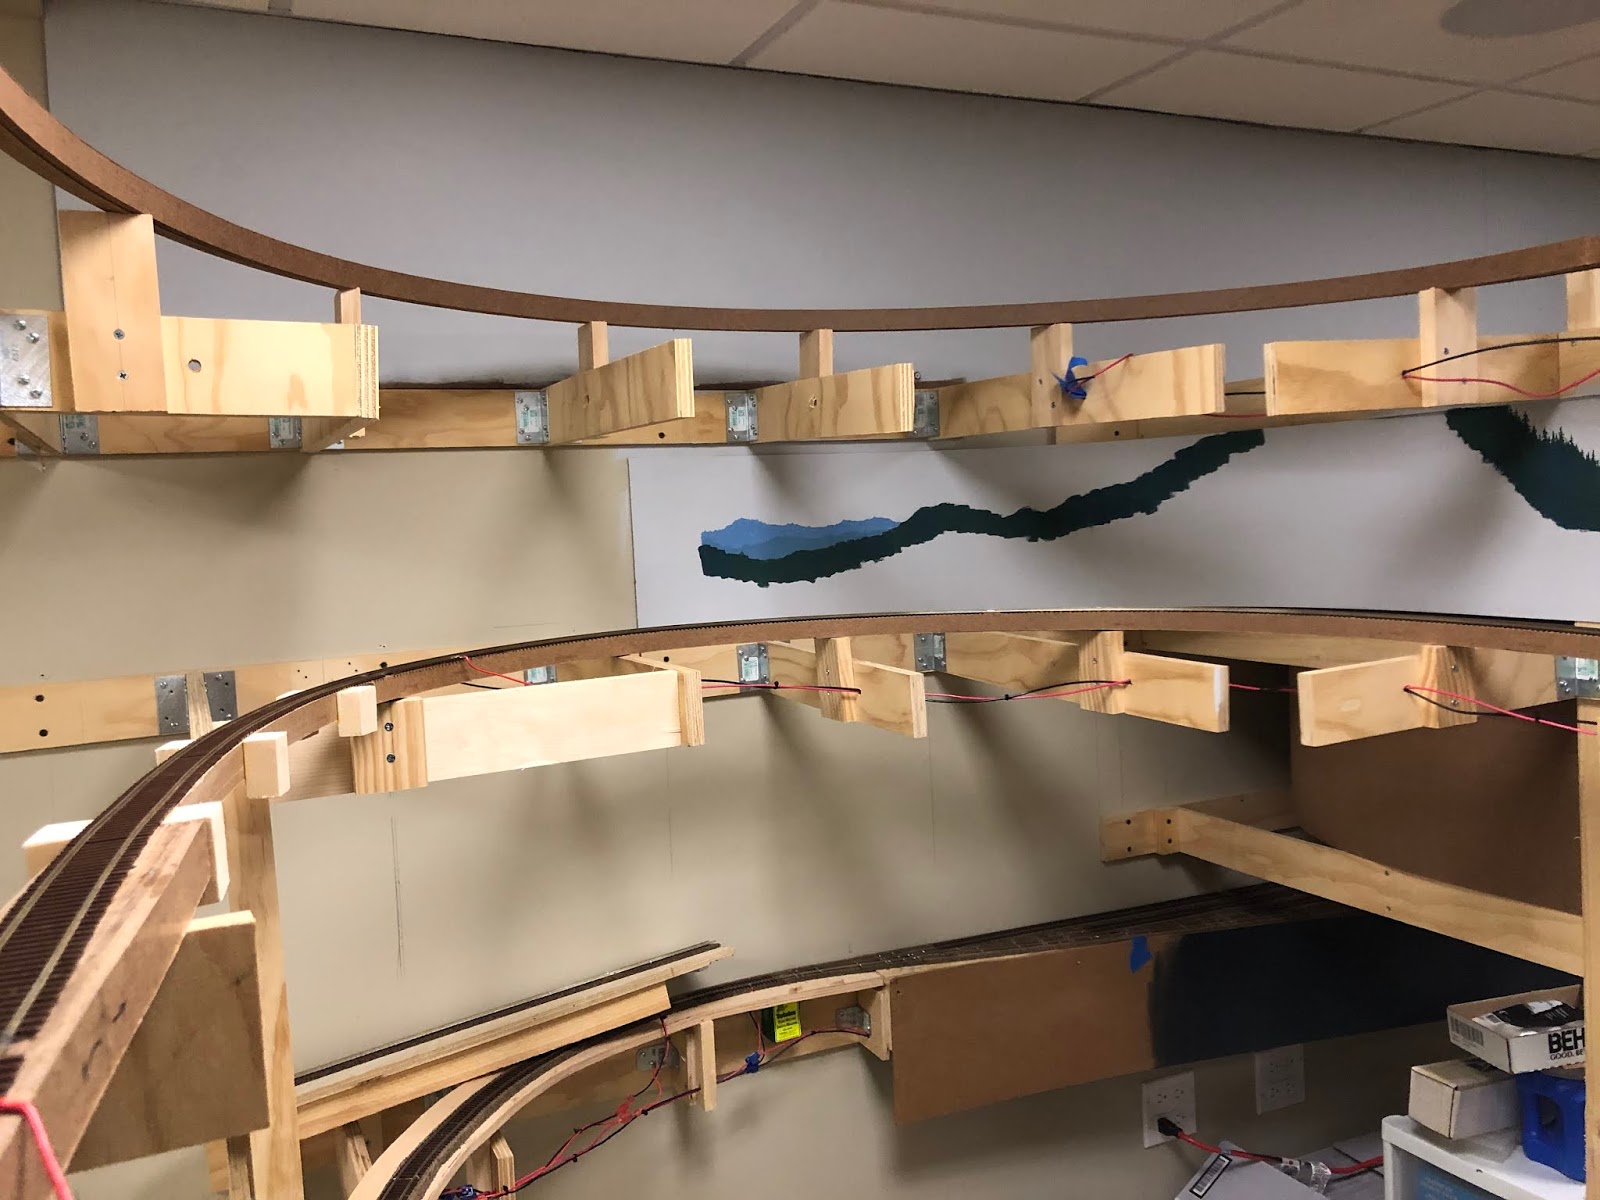
Above: The East (North) end of the siding at Fields. Still need to install the track on the siding, but this spot promises to be quite a busy place for meets during operation as 1 of 2 passing sidings on the line. 


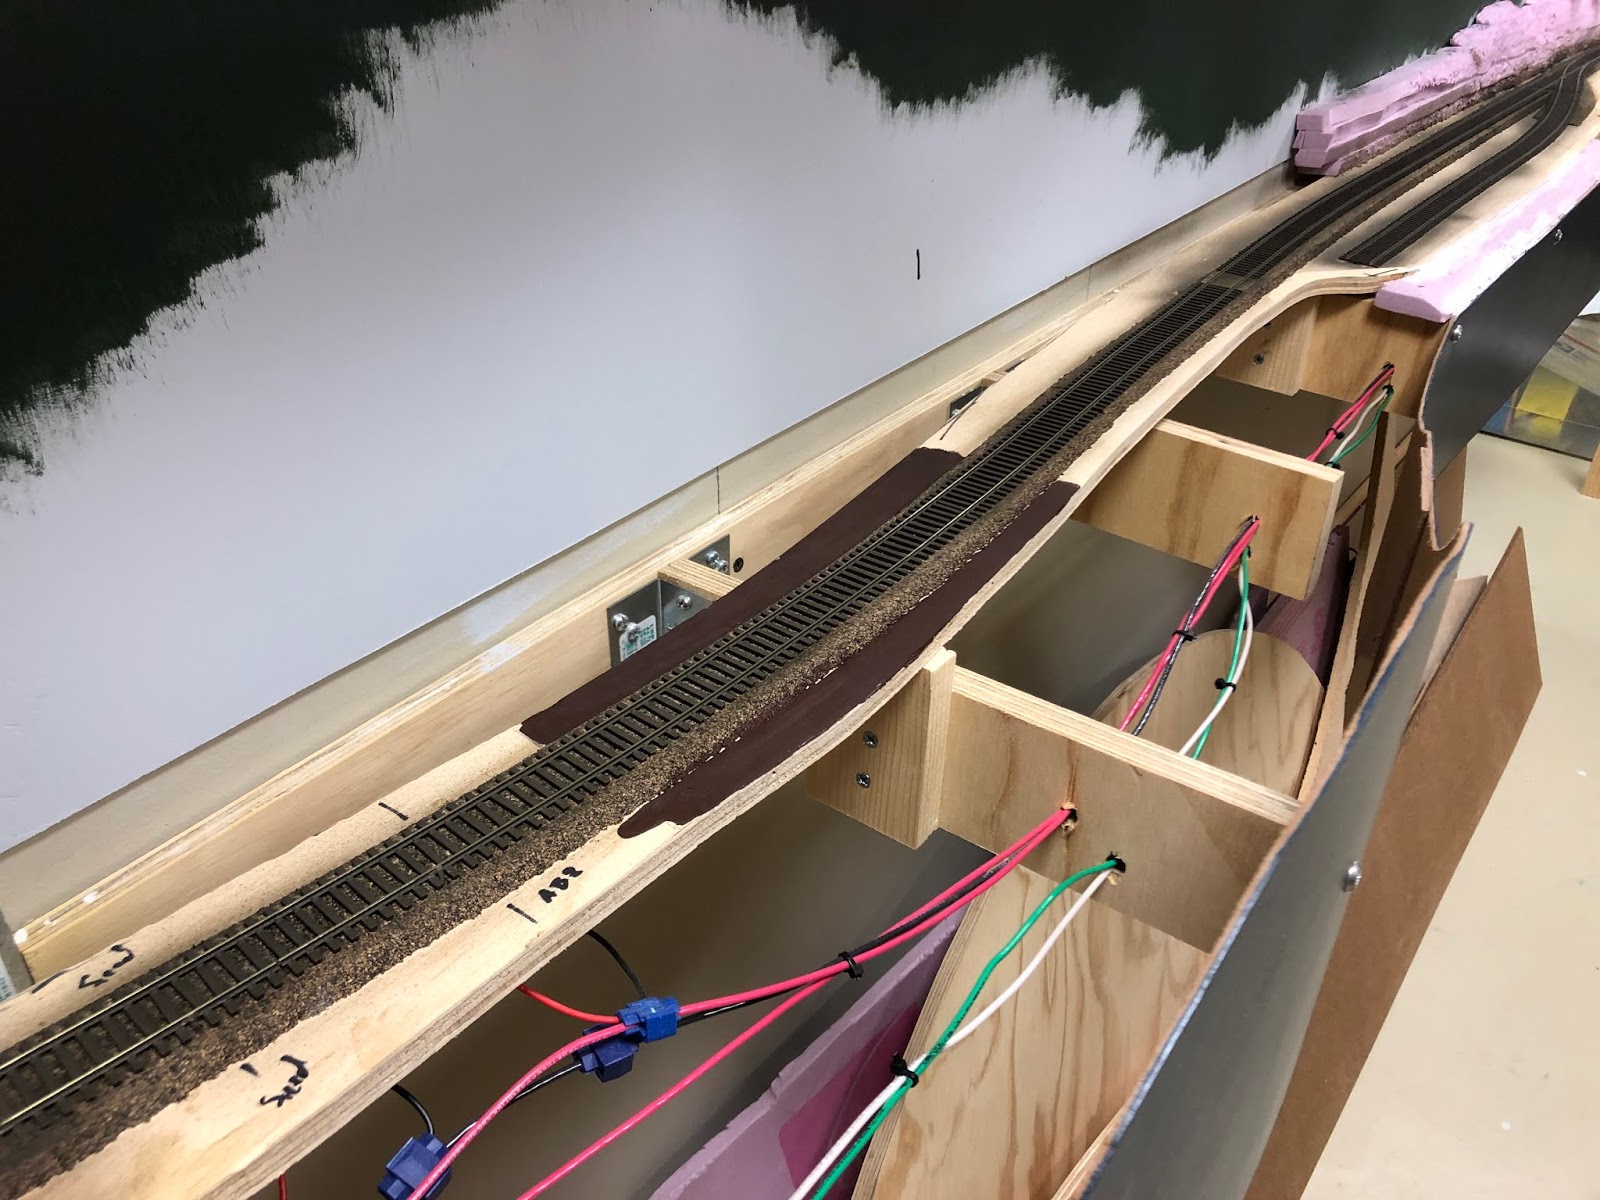
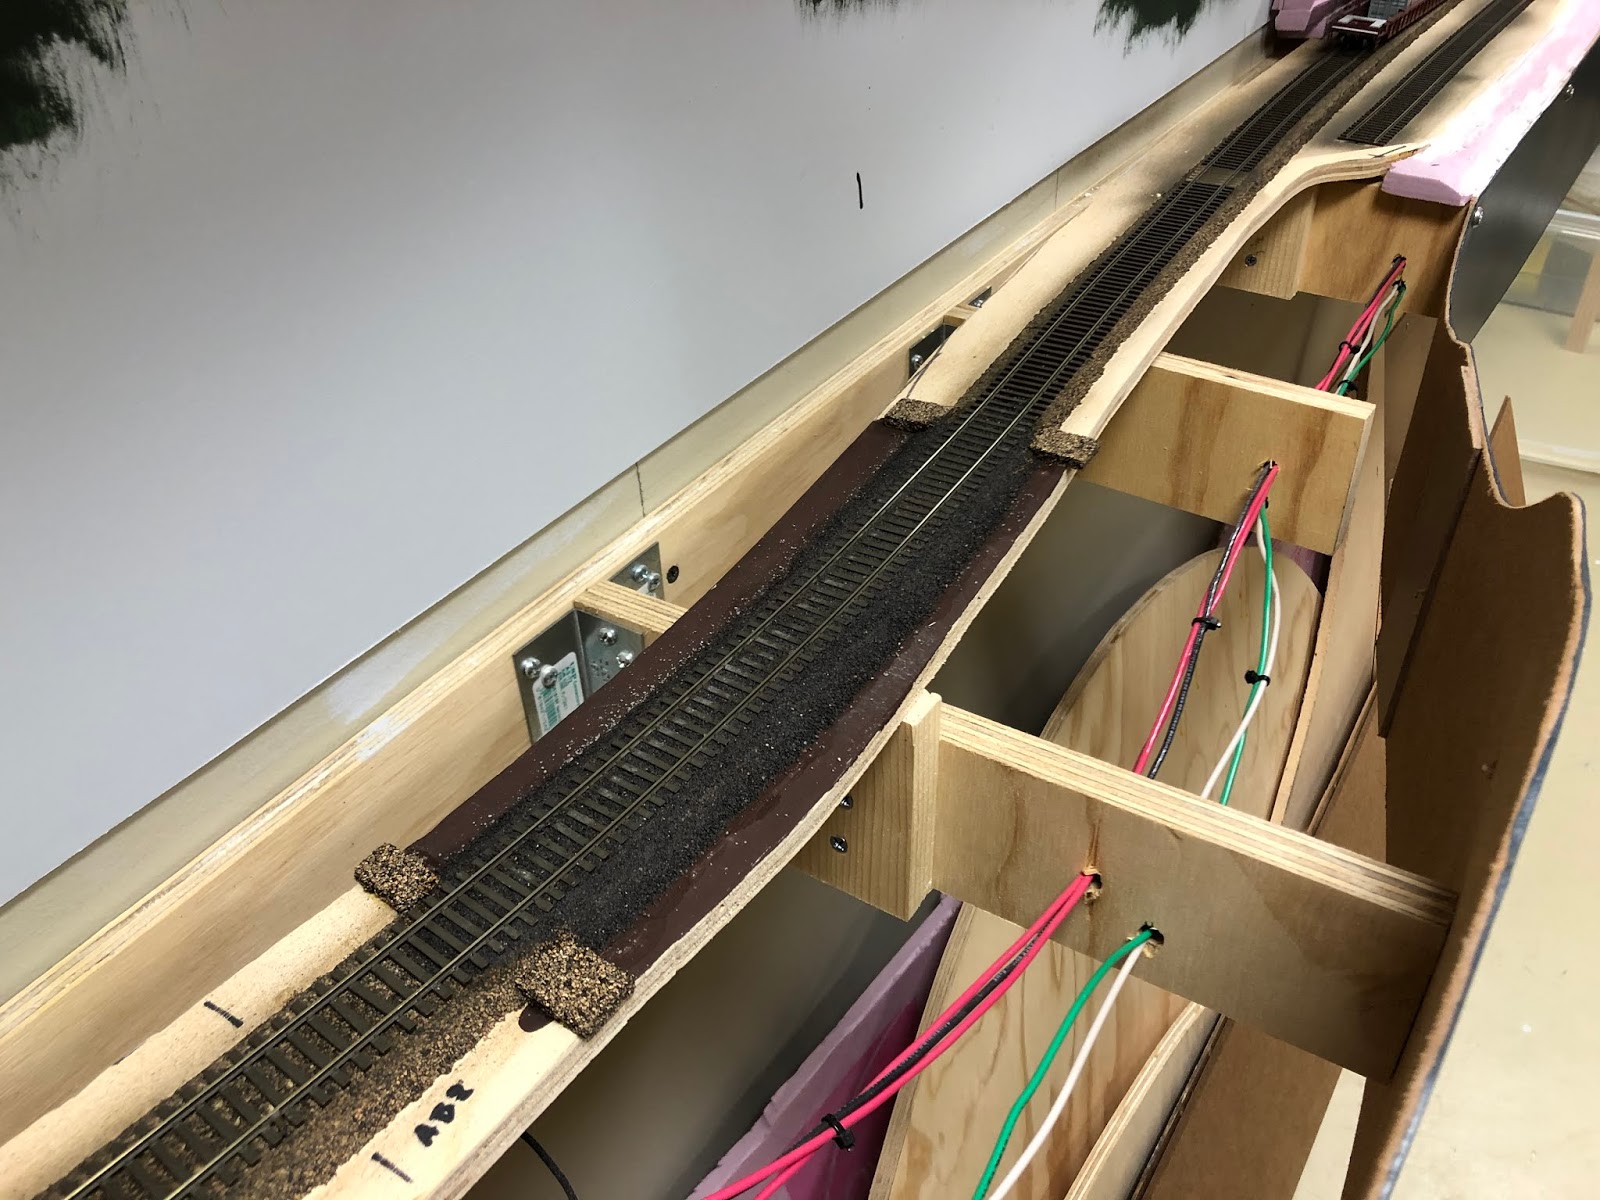
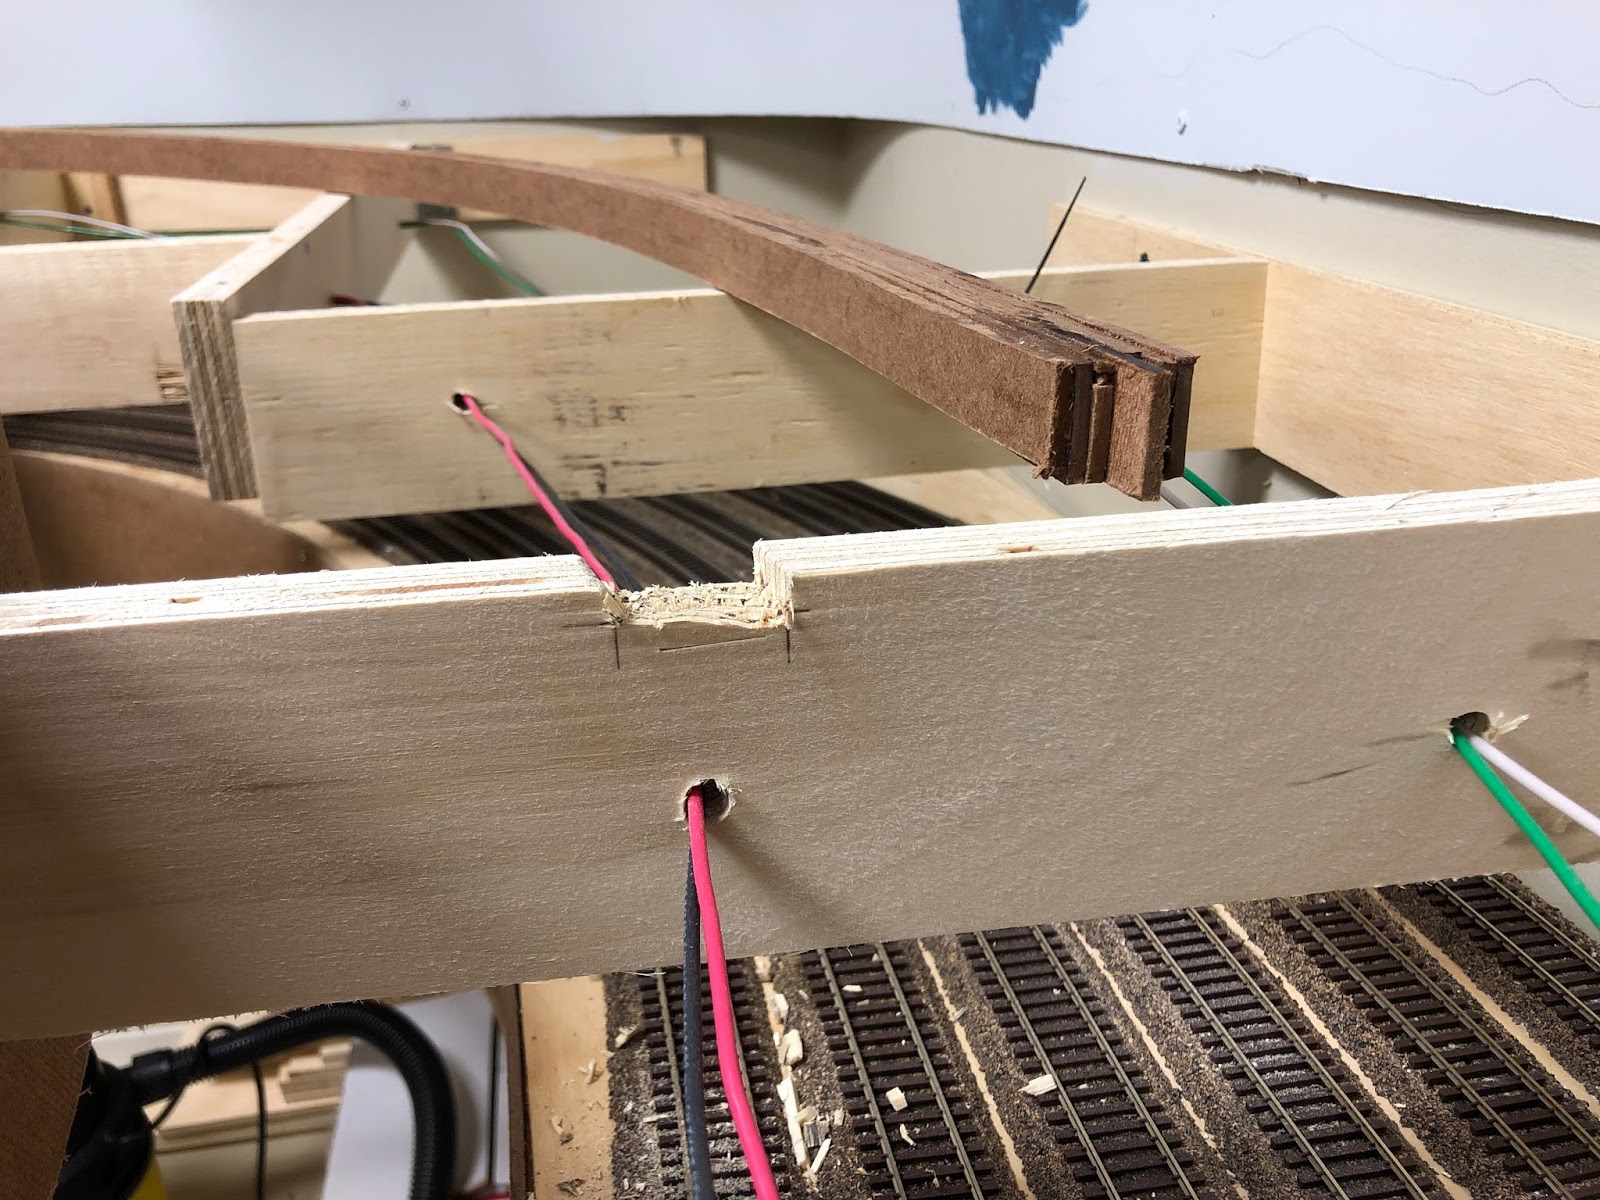
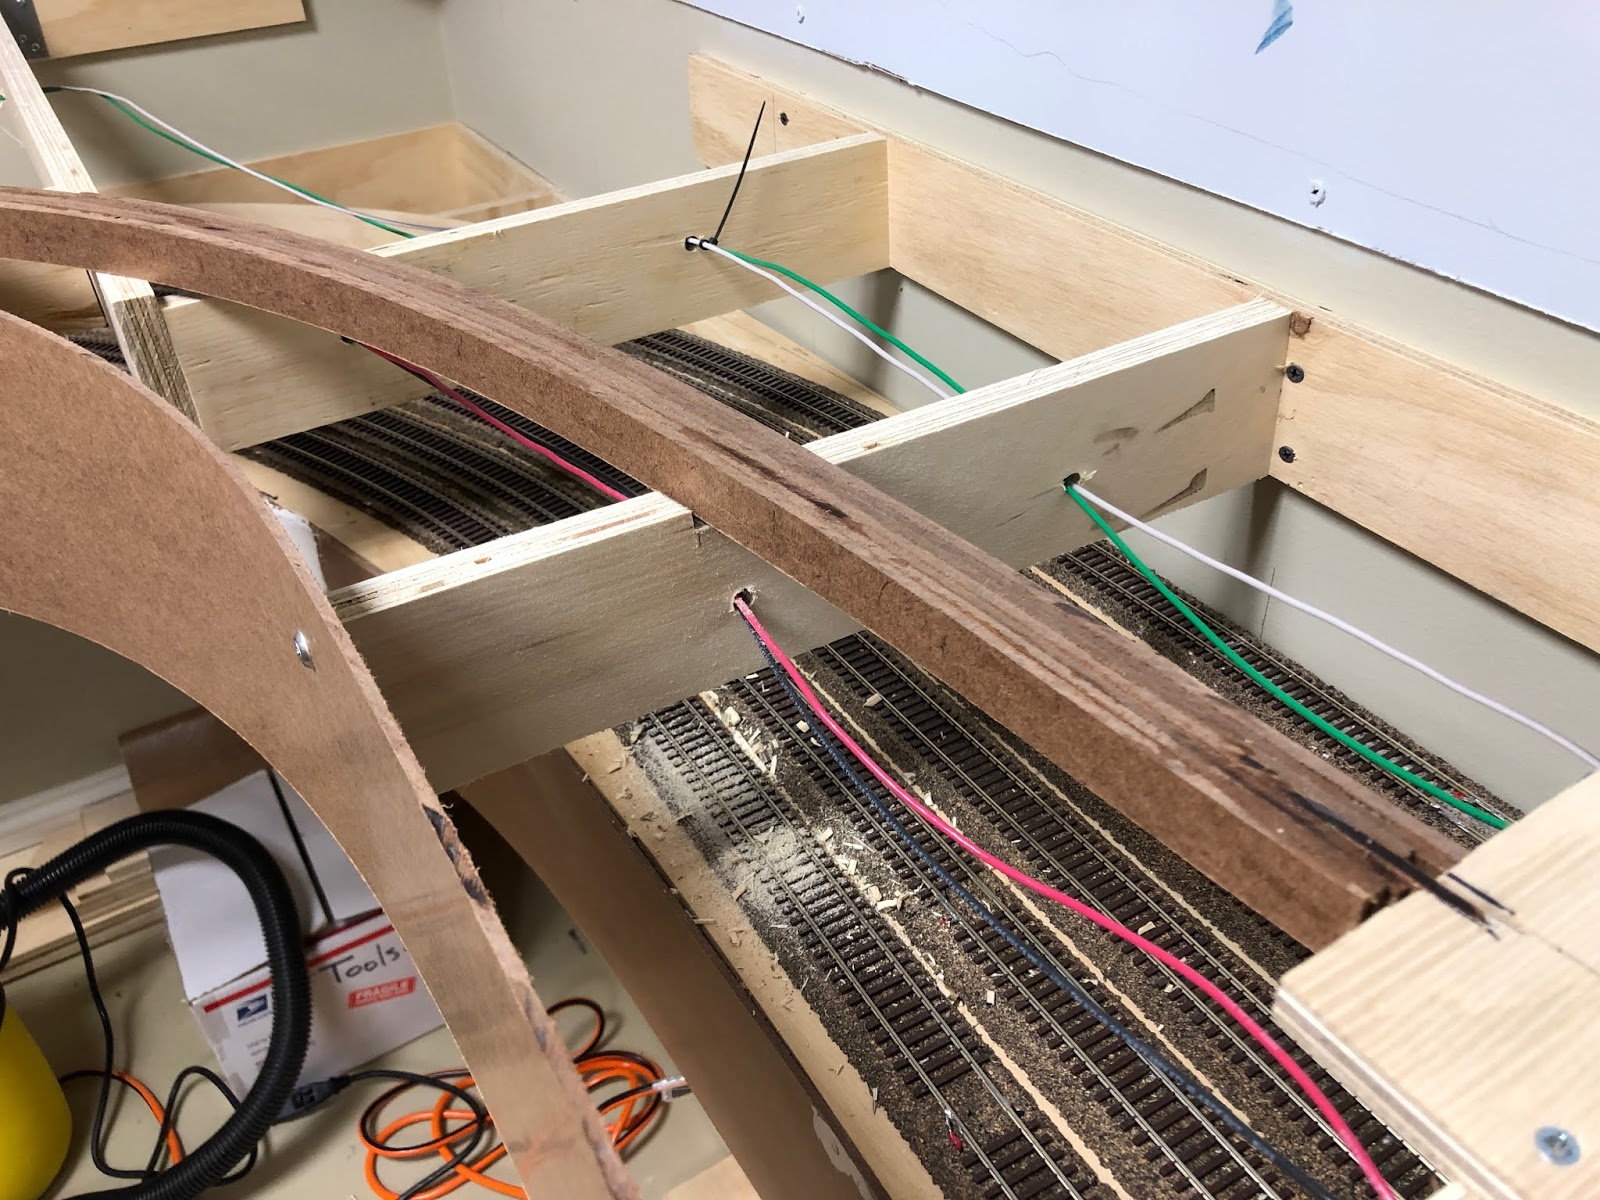
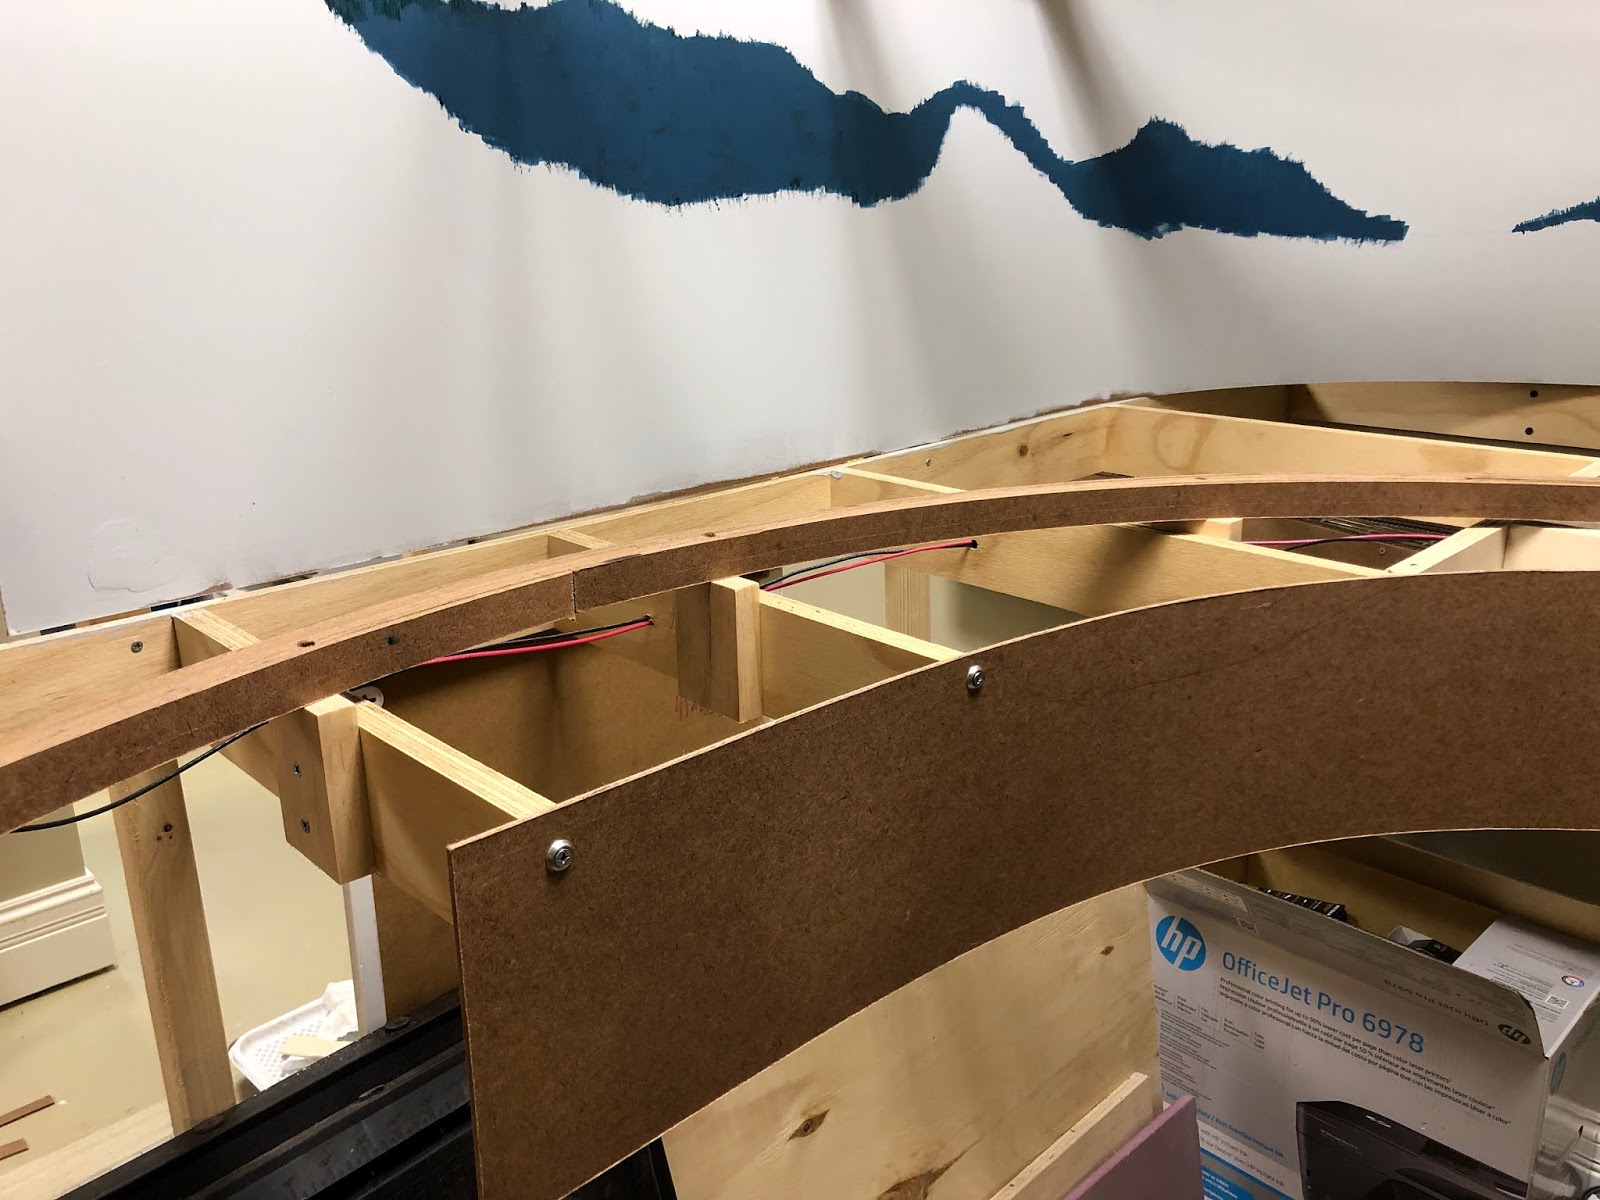
Above: The wiring at the West (South) end of the Fields Siding. With turnout control, signalling wires, and LED layout lighting for the below deck to come it is important to keep wiring neat and organized with zip ties. The red bus wires are for the detection zones. 


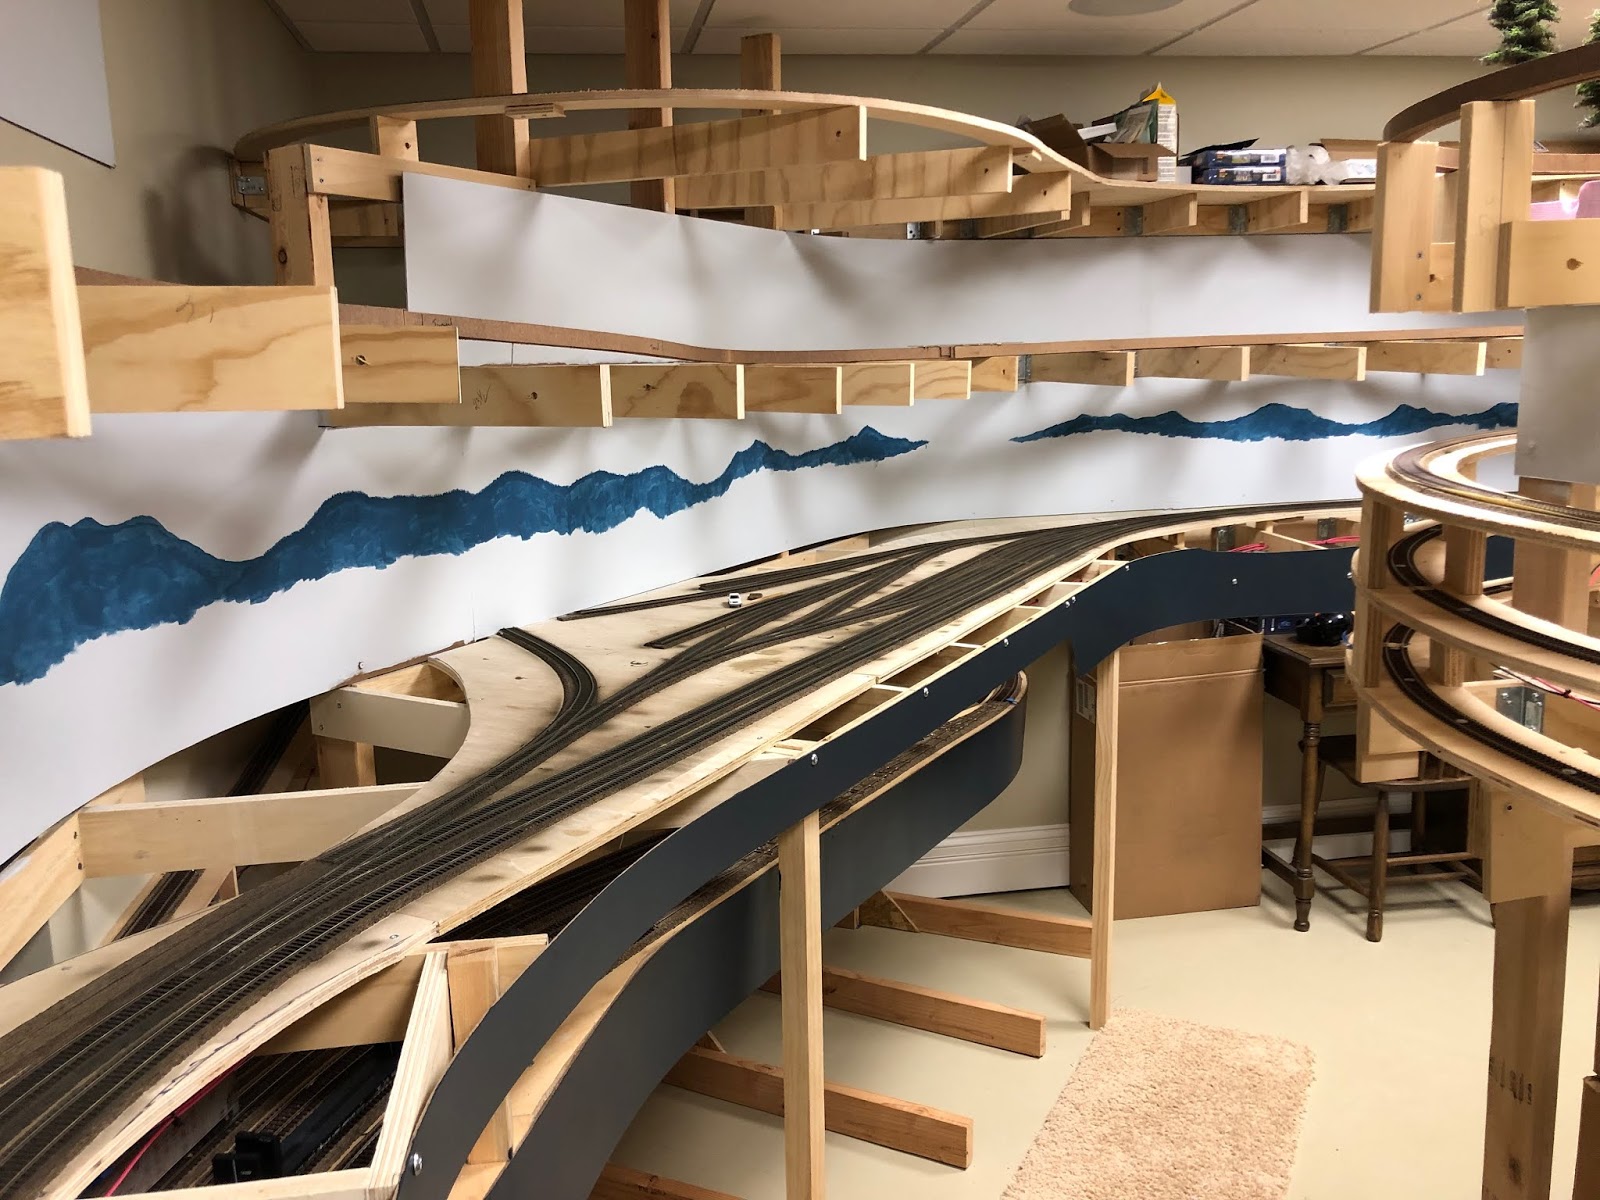
Above: Looking downhill from Noisy Creek (future site). With scenery terrain and fascia I will be much more comfortable running trains on the narrow splines. Right now it feels quite precarious. 


Above: Passing siding at Fields installed. 


Above: Looking downhill from Tunnel 4. Trees and rocks will dominate this portion of the run.


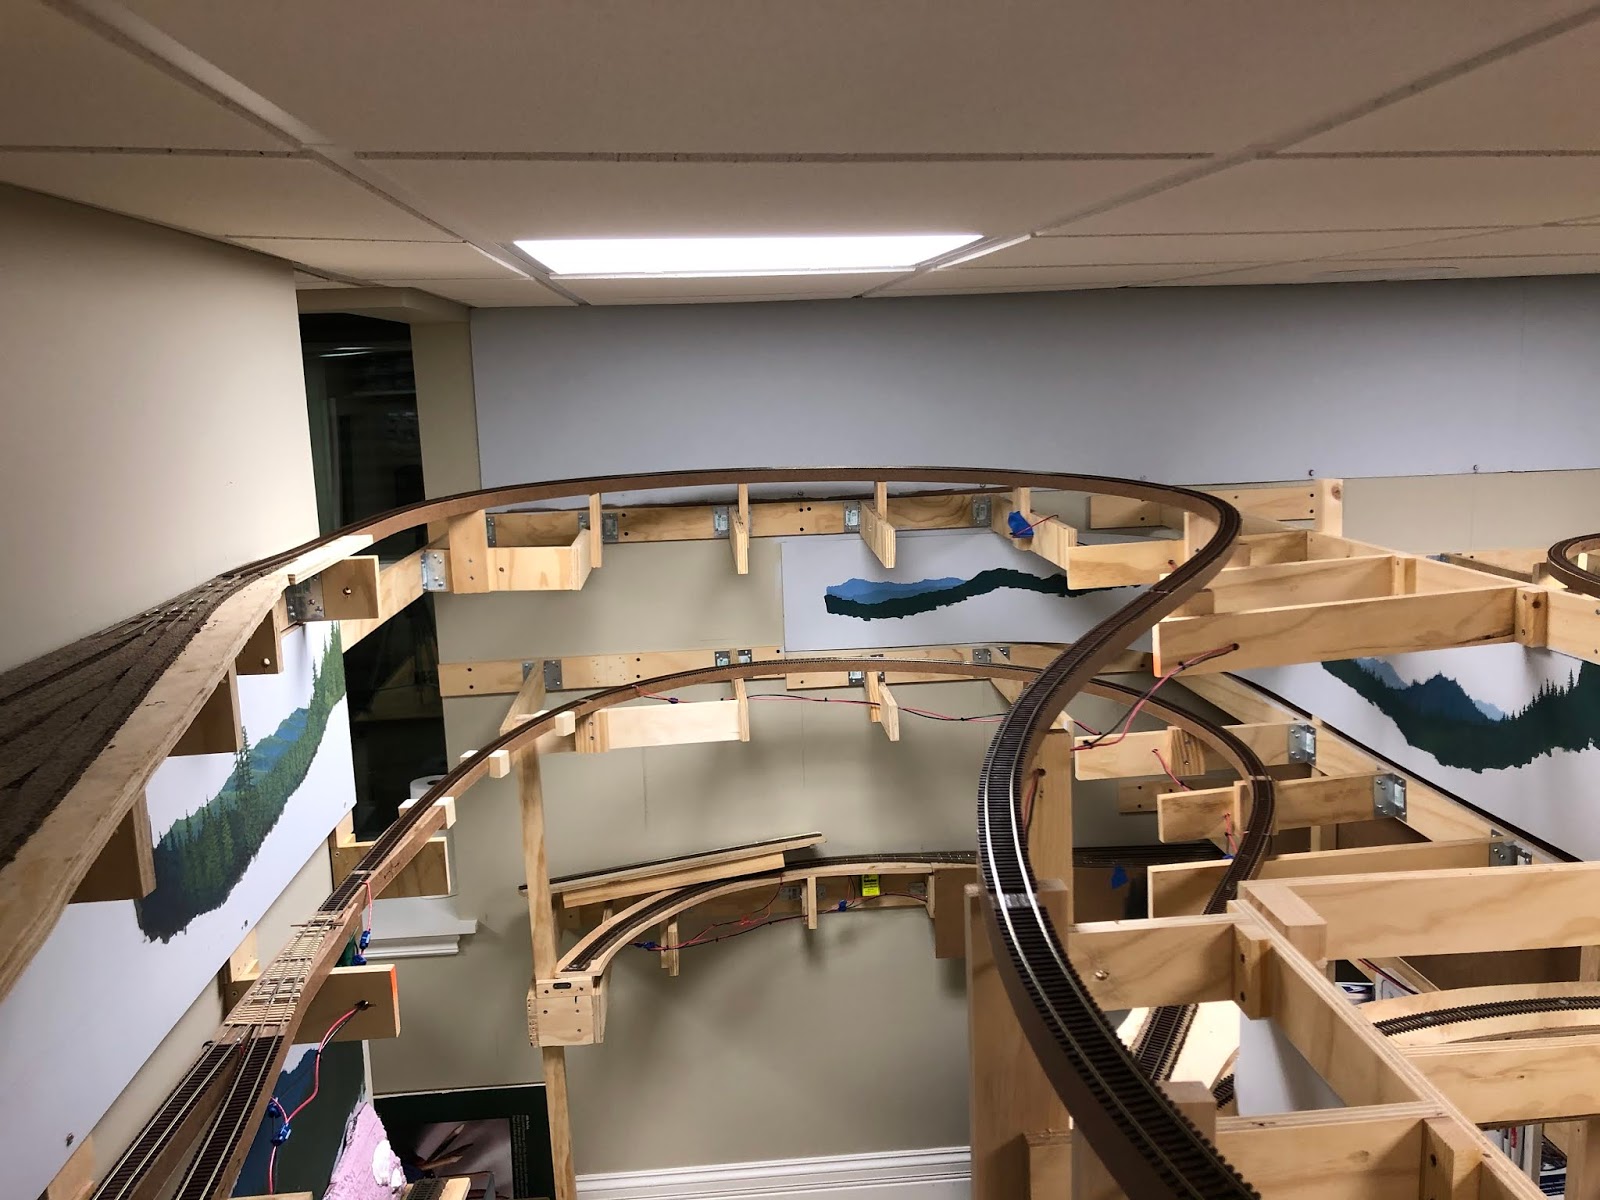
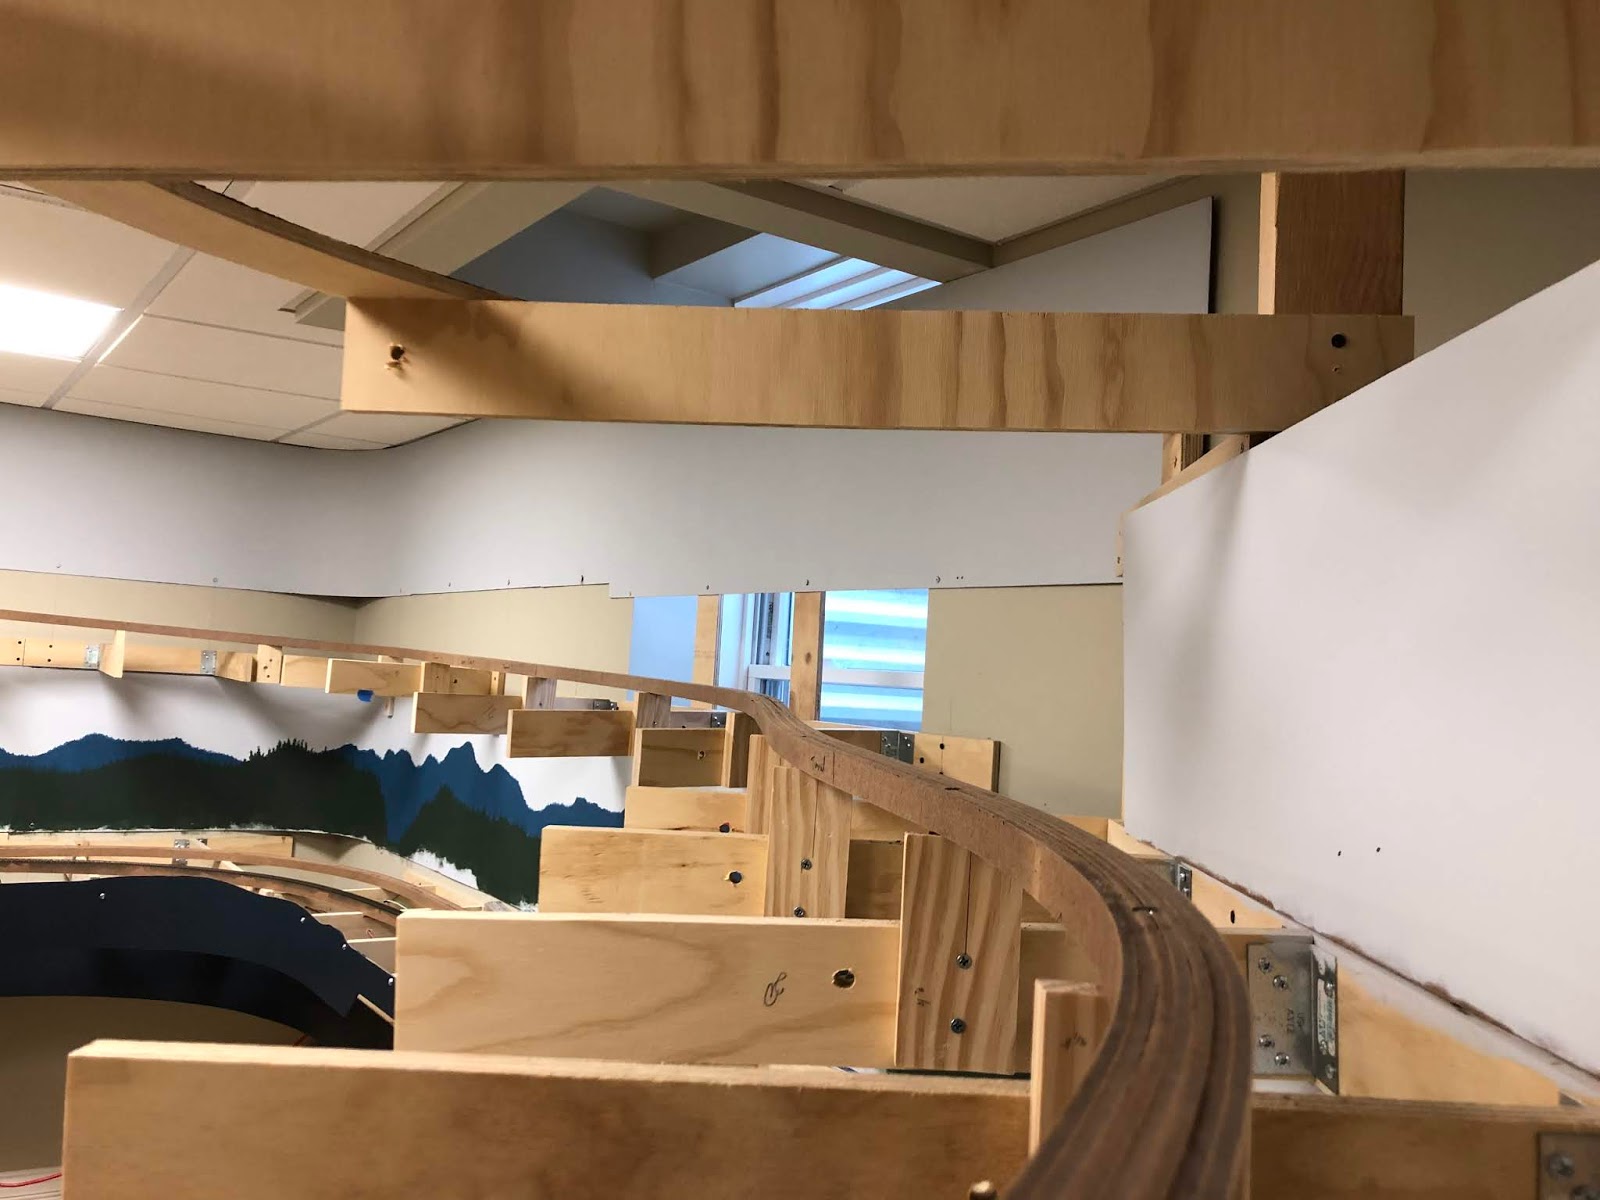
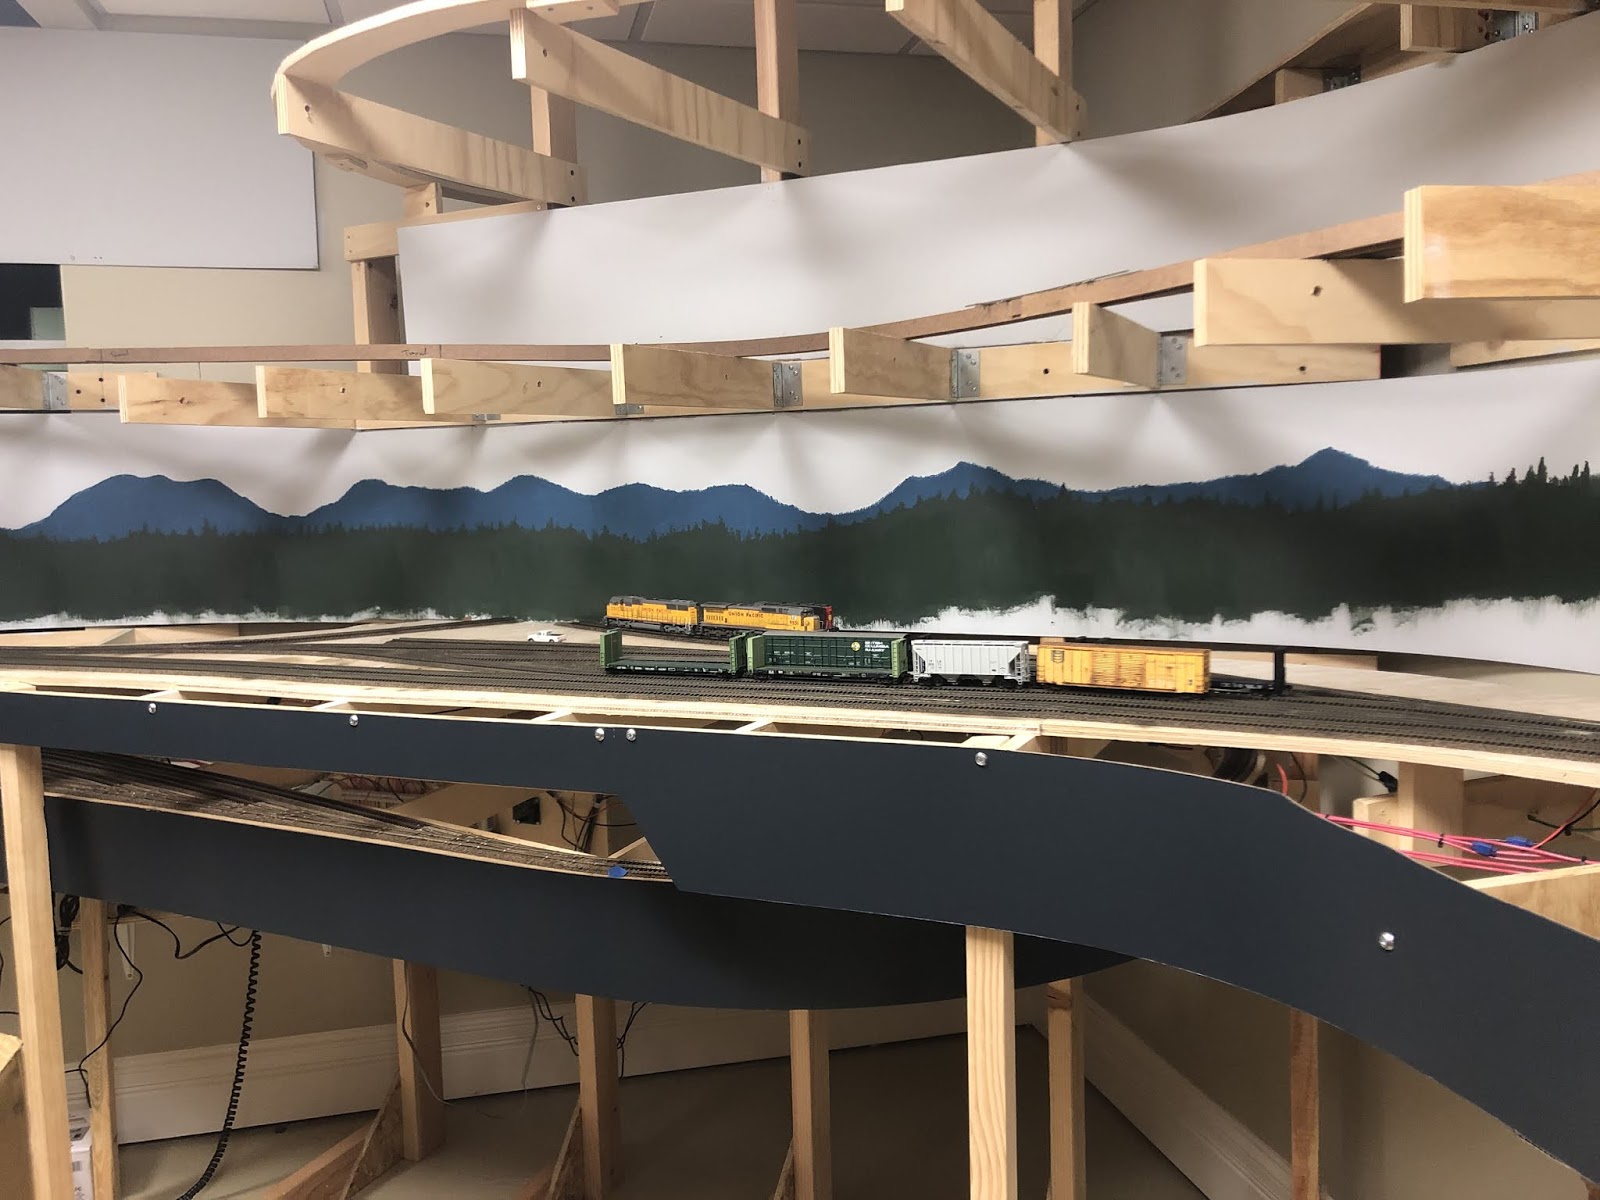
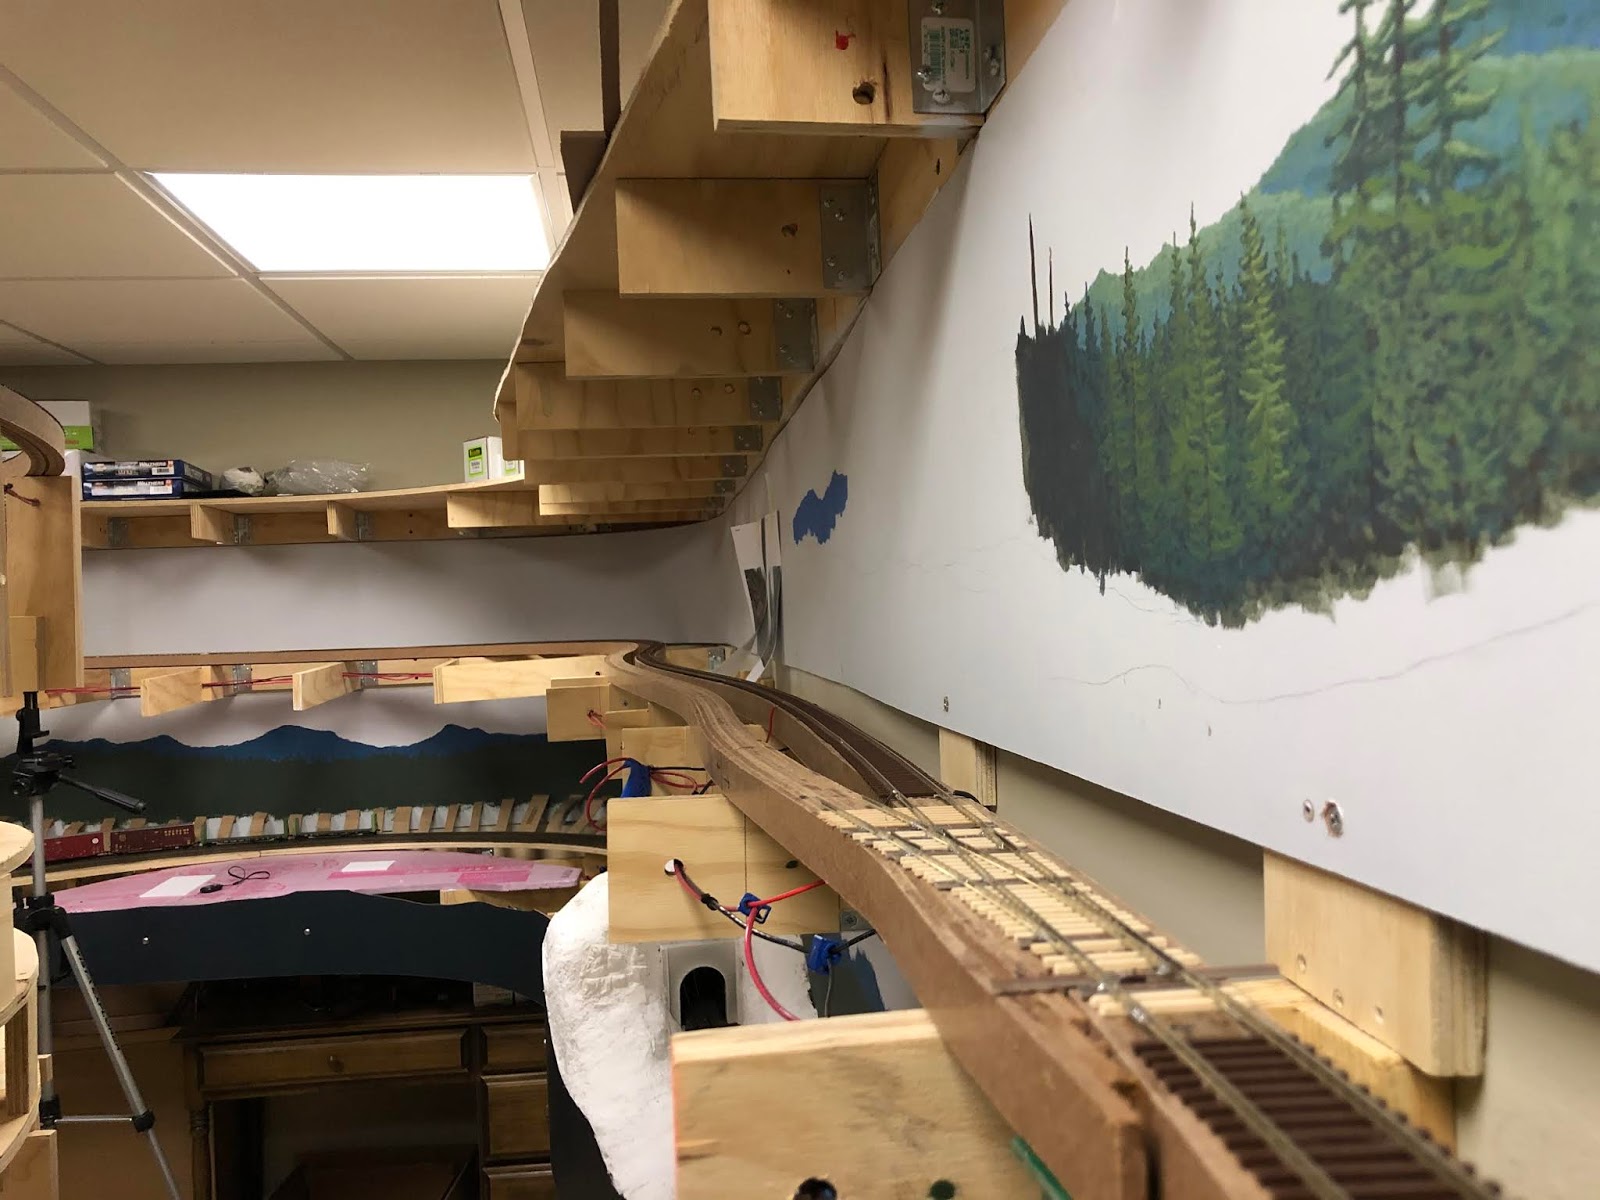
Above: Trackwork complete on visible portion of the mainline into Klamath Falls. This upper staging yard and summit sit almost 7 ft. off the basement floor and this shot offers a good perspective of the climb that is traversed from the lower level (seen in bottom of photo).

Following MEUKF 


Having completed its work in Oakridge, daily mixed freight MEUKF waits on the Oakridge passing siding for clearance to proceed up the hill on its way to Klamath Falls. This daily freight services Oakridge dropping off empties for Pope & Talbot Mill and picking up loads for destinations south. It's sister train MKFEU does the same in the opposite direction. 


After receiving clearance the locomotives flex their muscles climbing through Wicopee at the top of the helix. This train was short enough to not require helpers today, however most freights out of Oakridge will.


MEUKF is in the hole again at Fields waiting for a northbound priority freight from Roseville. On the grade, downhill trains are given priority. (Our train will remain in the hole until trackwork to Klamath Falls is completed!)

Tuesday, December 24, 2019

Up the Hill (Benchwork and Subroadbed)

This holiday season marks the fifth year of construction for the Cascade Subdivision railroad, and a project started many years ago has eluded my attention since: completing the track work to Klamath Falls. I originally constructed the spline roadbed in year two, however neglected completing the project for whatever reason. As Oakridge and the rest of the lower deck await scenery, it is time to bring the rest of the line up to speed.


The rebuilt benchwork at the railroad entrance to support the duck-under and lift-out sections. This in-your-face scene promises to be a great welcome to mountain railroading. 

The first mini project in this larger construction effort was rebuilding some of the benchwork at the top of the helix and the duck-under. I am really excited about this scene as it is the first one sees when entering the railroad, but had just installed "temporary" benchwork that I knew I had to modify when I was serious about construction. This rebuild can be seen in the above photo where I moved the led most joist on the middle level to the left ~5-6" to meet up with the 2x2" leg that supports the lower level liftout and the duck-under. The cross brace ties this new construction into the rest of the benchwork. 


Above: First two layers of spline roadbed clamped in place at the entrance to the railroad.

Next, I went straight into spline construction. As I have documented before, I laminate my splines before installing permanent risers so began by fitting the first two layers of spline before adding subsequently throughout the day, building up to 7 layers. Spline roadbed construction might be one of my favorite parts of building this railroad!


Above: Risers installed at Tunnel 4 just on the other side of the peninsula from Summit

As the glue for the spline dried I turned my attention to completing the installation of the spline roadbed up the rest of the hill. The spline itself was already built, but I had not got to installing the risers or securing the roadbed. I use 1x3 for the risers themselves, and work my way down the hill measuring and installing 4-5 risers at a time. 


Roadbed over Noisy Creek with two covered hoppers in place over the future trestle.

The spline is then attached to the risers with screws. This process solidifies the benchwork significantly. After everything is attached, the top of the spline is prepped for track by running a plane and sanding block over the top to smooth out any imperfections. Wiring and track is soon to follow!


Spline at the entrance to the railroad. This was the last stretch of roadbed to be installed on the railroad completing the major structural elements of the benchwork. 


Spline roadbed leaving Fields heading towards Tunnels 12, 10, and 9. Tunnels 9 and 10 bookend Noisy Creek Trestle. Fields is the last bit of respite (1.25% grade) before the steep push to Summit.


Monday, November 4, 2019

Good enough: Thoughts on the dangers of "how-to" dominated hobby

It is not often acknowledged, but model railroading is a difficult hobby. Our projects are complex, time-consuming, and diverse in scope, requiring of us to be planners and engineers, carpenters and electricians, and artists and sculptors. We seek to create a miniature built environment within a miniature natural world with increasingly complex interactions and diversity. To even come close is just shy of a miracle, and only accomplished by very few among us. 

Because of this reality, there are prevailing modes of how to best accomplish the various aspects of railroad building. These come from pioneering individuals or those with considerable experience in the form of simple how-to's. As a result, we as modelers we do not engage with the meaning or why of a project. We do what is considered best practice, no questions asked. Certainly, I do not mean to discredit or downplay the importance of the wealth of knowledge that is exists in the hobby, but have become aware of the danger of approaching our projects (entire railroads or individual models) with attention solely on the execution.
 
 As I have progressed in construction of my Cascade Subdivision Railroad, I have worked through numerous challenges, sometimes succeeding, sometimes not, relying on the extensive wealth of knowledge that exists in the process. In no way am I discouraged by this. Struggle and challenge is often what forces us to achieve at a higher level and develop as craftsman. Longtime followers will notice that my workflow is punctuated by week long spurts of progress throughout the year. This is a function of life at the moment, however, has provided the opportunity to plan and think through many aspects of the railroad and projects next on my list. It is rare that I enter a weeklong work session without a list of projects and materials guided by a few defined goals. This approach has been arguably successful and has allowed me to  work quickly and efficiently, most of the time. As time has gone on, the nature of the projects on my list has shifted from straightforward tasks (benchwork, wiring, trackwork, etc.) to thought-provoking challenges (scene composition, terrain, backdrops).

By far the most significant challenge for me on the railroad has been painting backdrops. This may come as a surprise given my extensive posting on the subject, however, with time I have recognized that this project has stalled progress elsewhere on the layout. I know dozens of ways of how to paint mountains and trees and have developed multiple techniques of my own, however, with each iteration, my painting became more detailed, more complex, and most importantly, more time intensive. I had taken what should have been  an exercise in simplicity to a level of complexity that was unnecessary.

Where I had gone astray was in attempting to literally paint the Cascades tree by tree, a task that even the most talented artist would find daunting. And so I redefined my goals. My backdrops are to simply provide an overall illusion of depth with color and shape and select details in some scenes where necessary. They simply must function as a reminder of the setting and feel of the place I am seeking to create, but not actually be that place. They just need to be good enough, and my scenery work will do the rest.

And so, I have become more than comfortable with good enough. My backdrops will not win any awards, but they will serve their intended purpose. When operating trains they do not distract from the foreground scenes and the main actors in my mountain railroading drama, but rather provide the foundation for the set within which these actors will play. Over time I may return with my brush and paints, to add a few details here and there or enhance some areas, but I can finally sleep easy. It has only been in taking a step back and considering the why of my approach backdrops within the scope of my vision for the railroad that I have been able to move forward: my backdrops are good enough for now...

Some examples of my work: 

Above: Current Backdrops in Oakridge. These were painted in a few hours over a couple of evenings and after adopting a simpler approach.


Above: My first attempts at backdrop painting. I lacked confidence and kept things simple. This turned out to be the secret! 


Above: Where I left my ambitious rendition of the Cascades...all 16 or so inches of them painted in 5-7 hours, I've lost track. Visually impressive, but not a sustainable method.


Above: Current backdrops near Pope and Talbot Mill and Salmon Creek. This image best captures my goal to provide depth and a foundation for 3D scenery. The painted scenes invoke the essence of a gray day in the Cascades, but are not distracting from what will be in the foreground: a mill, river, bridges, and trees!

Sunday, October 27, 2019

Westfir to Oakridge: Terrain

Terrain was next up for Westfir and Oakridge with trackwork, wiring, and backdrops all completed. I started work on some of the terrain forming with pink foam on the far end of Westfir, the first sceniked area of the railroad out of Eugene staging last winter. Since, I have decided to build the majority of the hills with cardboard strips, painters paper, and plaster, with flat areas that need more support out of pink foam. I started on the RR-East end of Oakridge: Tunnel 22 and a small residential area.


Above: Foam base in for residential area, and first layer of cardboard strips in place behind tracks. Gaps between foam and subroadbed will be filled with cardboard strips. Two white rectangles are foundations for some of the homes that will be modeled in this scene. Cardboard strips are held into place with hot glue.


Above: Beginnings of terrain around Tunnel 22. Had to wait for ballast to dry before securing the tunnel liners and portals. The cardboard is much faster and easier to work with than pink foam.


Above: Cardboard lattice finished around Tunnel 22.


Above: Pre-sculptamold. I covered the lattice with sections of painters paper. I found the paper is much easier to form if it is crumbled a bit first, otherwise it tends to hold its rolled shape. I filled major gaps and seams with masking tape.


Above: Sculptamold applied! I added some rock castings I had on hand.There are a few spots that will need to be touched up, but that shouldn't be too big of a deal.


Continuing to develop the terrain, I started to add some rock outcroppings. The prototype tunnel is fairly heavily vegetated so much of this might be covered, however, there are a few sections of particularly steep slopes that require some rock work, so I will be continuing this process in multiple areas around the two tunnel portals to supplement the rock castings. For my first attempt at carving I am pretty pleased with the results. Paint and weathering will reveal the true look, but so far so good!

Monday, October 21, 2019

Tunnel 22

As I begin to work on terrain in Westfir, Tunnel 22, the tunnel directly to the RR-East of Oakridge needed some attention. In order to cover the tunnel, I needed to build some liners and ballast the track that will be inside the tunnel. A great afternoon project to ease into some modeling!


I first painted the subroadbed on the inside of the tunnel a deep brown color. I was not too concerned about exactly which shade of brown, I just needed something dark to serve as a base for ballast.


While the paint dried I began constructing the tunnel liner. For a lightweight and low-cost solutions I went for foamboard and a textured cardstock I had on hand. This I held together with hot glue. I will be honest as I was putting these together I was beginning to be skeptical of how they would turn out, however, they proved to be quite sturdy and easy to put together! I simply used the tunnel portal as a template for the foam supports and went to town cutting!


Here is one half of the tunnel going through some rigorous testing. The tunnel portal I am using is sadly not prototypically accurate, but I think a fairly decent stand-in for the tunnels on the line. Only true Cascade fans will know its is not correct. I did raise the tunnels using scrap pieces of cork roadbed for my intermodal equipment to clear.


Ballast! This is the first true element of scenery on the layout. I installed Arizona Rock and Mineral ballast on the track inside the tunnel and secured it with WS Scenic Cement. The darker gray color is perfect, I was quite surprised as it comes in a very light color before securing it with glue.


I gave the two tunnel liners a spray with some black rattle-can paint I had on hand. Didn't go for a solid finish, but left some variation.


Tunnel in place! I have not secured everything just yet, but the scene is ready for some basic terrain. I still need to paint and weather the portals themselves and there are some gaps to fill on the lining, but otherwise this afternoon project turned out much better than I imagined and will be a technique I return to for the other 9-10 tunnels on the line. 

Sunday, October 20, 2019

First Level Backdrops Complete


 Above: A quiet cascade afternoon in Oakridge. Helper units sit waiting for their next trip up the hill on the back tracks.

After many hours spent trying to figure out how I wanted to paint the backdrops for my Cascade Sub Railroad (more on that in a coming post) I finally bit the bullet and completed the backdrops on the lower level.

The backdrops add much needed depth to the railroad and serve as a foundation for future scenery work. I am purposely keeping the painting simple, but suggestive of distant landforms and trees. I've run into the trap of trying to paint every tree and rock, but I think in this case less is more!


 Above: Oakridge from operator's height. Where there is whitespace at the ground level I will build up terrain and vegetation to blend the foreground into the backdrop.

 Above: Salmon Creek and Pope & Talbot Lumber.. This alcove of the railroad room is starting to have the feeling of stepping into another place and time: a rainy, spring day in the Cascades.

Above: Westfir and future Tunnel 23. This is the "first" scene of the railroad and important for setting the stage for the rest of the modeled Cascade Line. With backdrops complete, the scene is coming together more and more. 

Saturday, September 28, 2019

Fall Update

It has been some time since my last update on the railroad. Heading into the fall and winter modeling season, I wanted to share a brief status report of the layout and some of the projects I plan to take on in the coming months.


The base of the backdrop painting in Oakridge is halfway complete. I plan to add additional details and tweak some spots, but forge ahead with completing all of the backdrops this fall.


The "first" scene on the railroad, Westfir, is probably the most developed with semi-completed backdrops and the start of scenery. Projects in Westfir this winter will be touching up the backdrops, making some modifications on the swing bridge, and continuing with terrain development into Oakridge.


The Salmon River/Pope & Talbot mill scene took some shape last winter with subroadbed, backdrop, and some track work. Plans for the winter are to complete the backdrops and trackwork and begin working on scenery terrain.


Parting shot of Oakridge yard with completed trackwork, wiring, and fascia. This scene is ready for scenery terrain, streets, building mock-ups, and TRAINS to start rolling up the hill.

In addition to the projects mentioned, the upper deck of the railroad needs some attention. Spline roadbed has been installed, but I need to complete adding risers to close out subroadbed work. Completing this and backdrops will be a priority this winter as well as making progress on trackwork and wiring. Stay tuned!

Friday, January 25, 2019

Oakridge Backdrops: Enhancing the Base

In a previous post 2 weeks ago I discussed establishing a "base" on the backdrop for further detailing and scenery development. In Oakridge, a town that is surrounded by prominent hills, I wanted to take some time to work on developing my base painting at a higher level of detail, specifically detailing the prominent features in the background before I move on to any foreground painting.

To lay out the hills behind Oakridge, I used Bing Maps (Google does not have Oakridge in Streetview) as reference for the surroundings. I simply lightly sketched the real background to the yard onto my backdrop, and then filled in those hills with my mid-back ground paint color.


Background hills laid out behind Oakridge.


Base background hills directly behind Oakridge.

One of the things I really struggled with initially is color. I included a photo of my palette just to give an idea of some of the colors I was working with. For starters, I have moved away from cheap craft acrylics and am now working with artists acrylics. In my previous posts I wanted to use the cheaper paints as I experimented, but now with more established techniques am working with higher quality paint. I used a blue, yellow, black, and white and mix colors from there.


The photo below demonstrates how I am working the detail the base. First I add a colors that in ever so slightly darker than my base which is serving as my mid-range value. This establishes my dark shadows. From there I add 2-3 layers of green to form the trees. Here I have only done a small area, but the results are worth the trouble.

In progress of background hill work in Oakridge

With time I will update the progress of this painting effort, but wanted to document this process within approximate time frame to my post on "Base Painting" to demonstrate how I am working in subtle detail into my backdrops. 

Friday, January 18, 2019

Spline Roadbed 2: Risers to Track

Before installing track on my spline roadbed, I needed to set the grade out of Oakridge. For the remainder of the mainline up to Klammath Falls the track climbs at 2.5% starting immediately in Oakridge. When I built my benchwork I took the grade into account, however in the Salmon Creek area directly adjacent to Oakridge I originally planned to use 1/2" plywood for my subroadbed, not my 1" tall spline. As such, I needed to notch the benchwork on one of the joists to allow for the appropriate grade. 


Notch marked and ready to be cut out. Red/black wires are mainline bus wires while the green/white are for the future Pope & Talbot Mill.


Roughly cut with coping saw and chisel. Cleaned the cut with a wood rasp and sanding block for a smooth fit.


Fitting the spline into the notch, which set the proper grade out of Oakridge. Secured to benchwork with countersunk #6x1.5" woodscrew.

In places where the spline rose above the height of the benchwork, I used 1x3 premium lumber cut to height as risers. I have found this to be the best for the spline in other areas of the layout. Again the spline is attached to the benchwork with #6 screws. 


Riser installed in Salmon Creek area. 


Risers installed over what will be a much scaled down version of Salmon Creek. Note the faint pencil lines on the fascia which will be cut out to match profile of terrain. 

After risers were secured, I added track directly to the spline with clear caulk for adhesive. I used a plane to smooth any roughness in the spline and followed that with a sanding block before installing the track. Feeders were soldered to the rains and before long the first (albeit short) freight rumbled its way out of Oakridge and  further onto the Cascade Sub.

A short freight makes its way up the hill after waiting in Oakridge for track to be completed. 

With one more short section of spline to install, roadbed is 95% complete for the layout with 50% of the run fully operational. Soon the busy mainline will open for UP revenue freights and the Amtrak Coast Starlight!