Monday, April 27, 2020

Westfir Scenery - Base Vegetation

With the terrain in Westfir completed, I began to explore options for adding spring scenery. Most of us model the heat and bright sunny days of summer, however, the Cascade Sub is firmly set in the rainy days of late April and early May. As such, there are a few more considerations when it comes to developing the scenery across the layout. For one, I have to be selective about color and texture, but also elevation. As scenery progresses up the hill I will reduce the level of lushness simulating the delayed response of vegetation at higher elevations. 

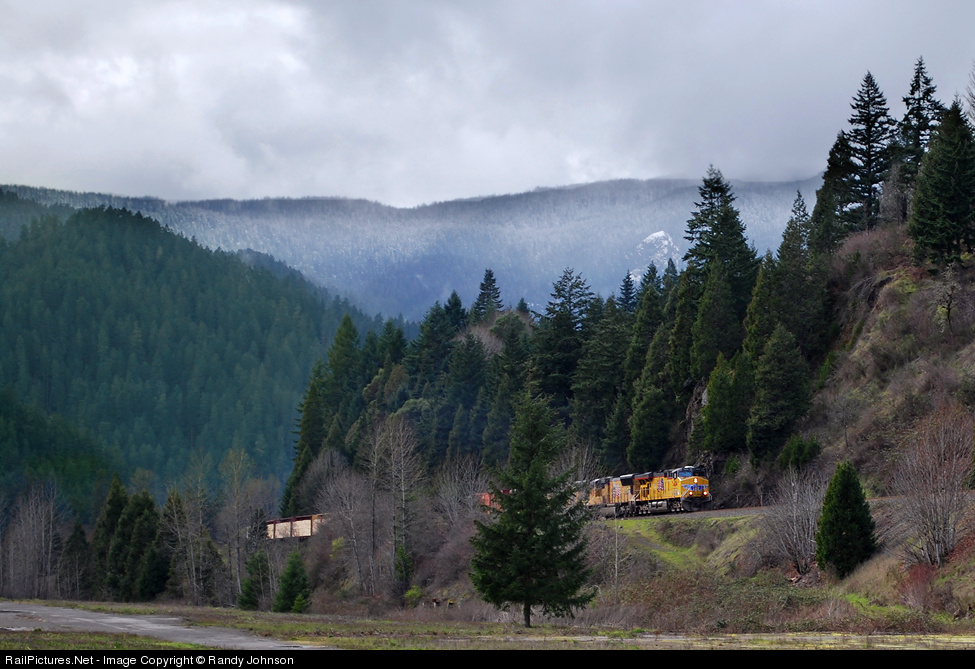
Reference material available online and through others has been an incredibly valuable resource in putting together the pieces of this scenic challenge. Below are two pictures of the prototype Westfir which I am using as primary reference. A few things stand out to me as "must have" elements. First, hillsides dominated by conifers. Important to note are the somewhat lighter green tones that can be seen, especially in the first photo. Given my small space and the narrow width of the scene, trees will have to interact well with the backdrop and foreground to give the impression of ubiquitous conifer growth.  

Secondly, bare and budding deciduous growth is the prevalent, despite the conifer dominance. Trees, bushes, brush, and shrubs are all in early stages of leaf development. In Westfir this development will be represented by greater lushness than at the summit.  

Finally, grass are lighter shades of green with deeper green areas where more growth has occurred. Blends of light greens and yellows will help achieve this early season look. The challenge will be to balance the bright colors such that the scene does not appear cartoonish. 


UP mixed freight through Westfir (Randy Johnson).


 Westfir (Randy Johnson).

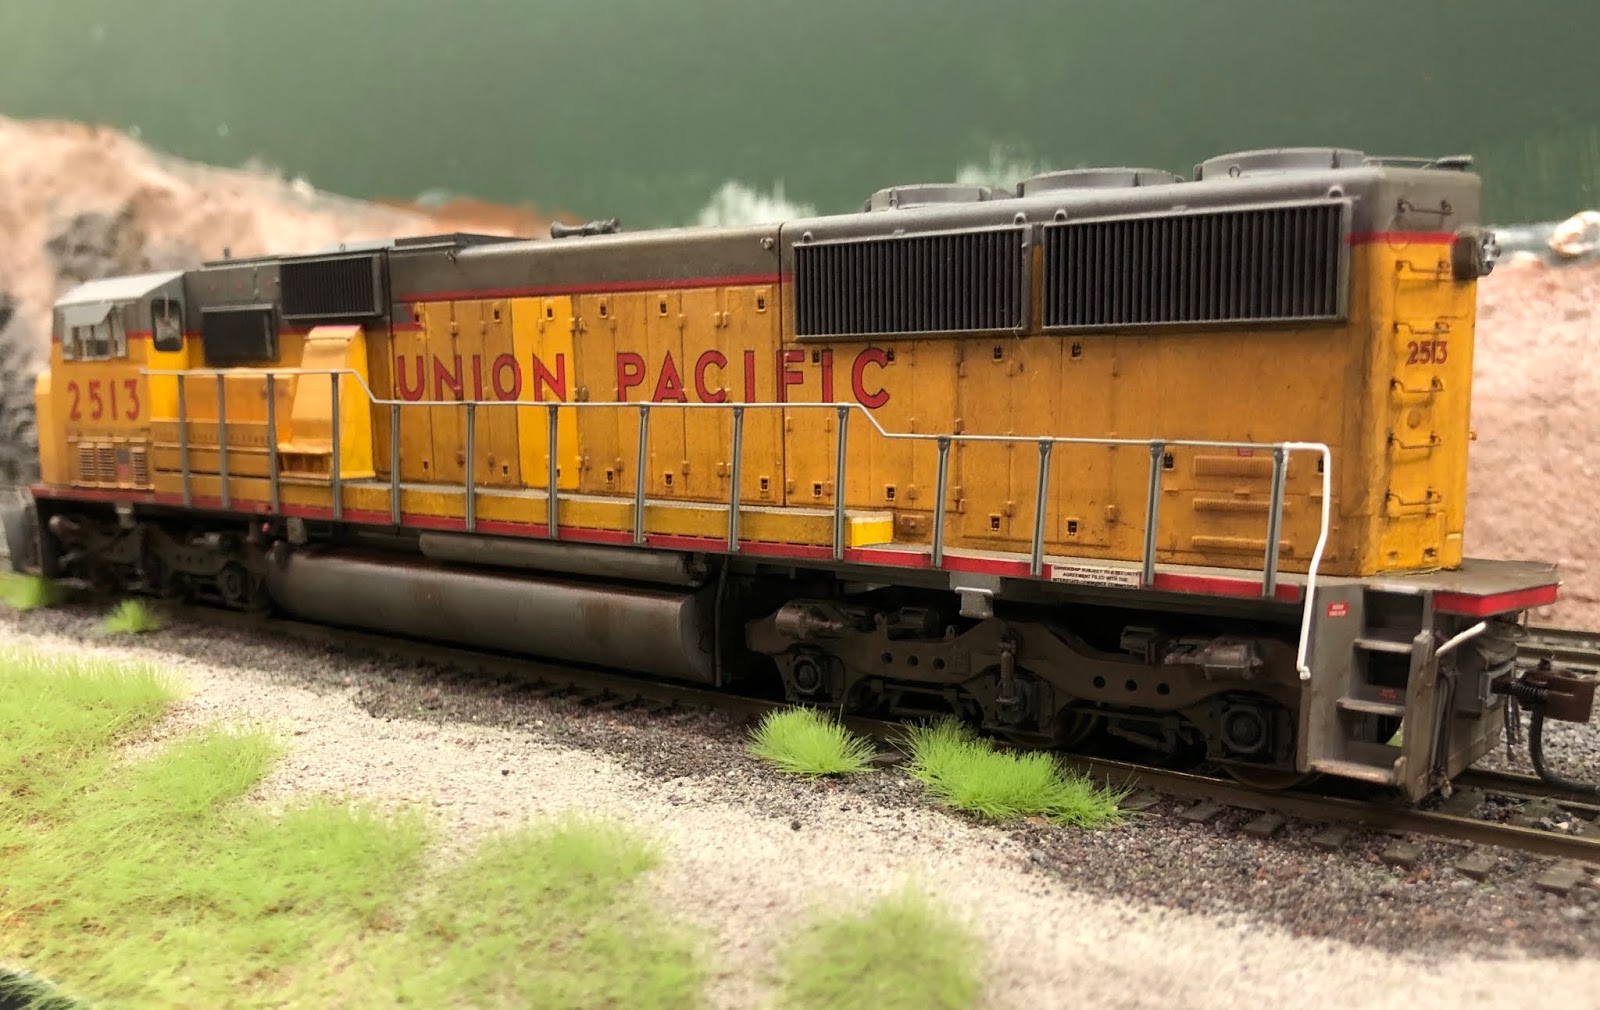
Much of the textures and complexity found on the prototype and in the photos above would be nearly impossible to replicate well, so my focus will be executing the major springtime characteristics well. I started with the grasses. After testing a small section, I proceeded to add 4mm spring green static grass from Silflor along the fascia side of the right-of-way. The grass is held in place with full strength white glue applied with a brush. Silflor tufts were also added along the spur with white glue. As can be seen in the photos below, this growth is relatively lush and will need to be balanced with future scenery work, specifically conifers, still dormant foliage, additional grass layers and ground textures such as ground, dried leaves. 


Grasses and tufts added in Westfir. Adhered with white glue applied with a brush to the dirt. The grass is not a uniform blanket, rather a series of connected clumps.


Grass and tufts applied along the spur. Here it is evident the scene needs more color variation as it is currently dominated by the grass and dirt colors. Additional variation with other vegetation as well as differing shades of static grass will help. 


Even a narrow scene provides a multitude of opportunities for scenery.

Certainly there is a great deal of scenery to add to this scene, however these initial layers of scenery have gone a long way to bringing the railroad to life. Future posts will detail how this scene progresses as more scenic elements are addressed.

Tuesday, April 21, 2020

Weathering Shop - UP 2513


My locomotive fleet has been in need of attention for some time, specifically in the weathering department. As scenery starts to develop, glossy out-of-the-box models stand out like a sore thumb. First on the list of projects was UP 2513, an Athearn Genesis SD60, which spent the previous week in the weathering shop.


It has been some time since I have weathered a locomotive, but I have undertaken multiple freight car projects in recent months. Initially I was overwhelmed by the additional complexity a locomotive presents, but using many prototype photos and sticking to tried and true methods made the project manageable.  Additionally, I kept the number of materials I used to a minimum, focusing on different modes of application rather than trying to juggle a multitude of products. 


I used techniques employed by weathering artists including Kevin Packard and Gary Christenson. I used acrylic paints for fading, grime, and other washes. I used water mixable oils on the underframe, trucks, and fuel tank. Weathering powders were used sparingly across the model. Each successive layer was sealed with Dullcote.


There are a few more details to add to this model including a PTC antenna, yellow reflective tape, and new handrails. Other than that it is ready for helper service on the Cascade Subdivision. 

Friday, April 17, 2020

Oakridge Realignment

Central to the operations scheme on my Cascade Subdivision is the use of manned helpers. While this is not necessarily prototypical given the widespread use of DPU's, manned helpers will provide a engaging modeled operation for running freights up to Cascade Summit. (Change: Manned helpers are currently being used on the Cascade Sub. -Thanks to Bill Decker for Update!) Consequently, Oakridge will serve as the main base for helper operations. The track arrangement in the modeled Oakridge is based on the prototype, albeit greatly compressed. The most significant of these compressions is the reduction of the wye to a pair of tracks curving into the backdrop. This greatly enhances the prototypical feel of the yard, but limits tracks for helper and MOW power to one stub track and a shorter double ended track.


Above: Original track alignment in Oakridge. From left: East wye, helper pocket/local power (2), yard runthrough/around, lumber storage (2), passing siding, mainline. 

The stub ended helper pocket created an issue for operational efficiency. Helper power returning from a run up the hill would enter the yard and use the runaround track to traverse to the other end before reversing into the pocket. To eliminate the extra and inefficient movement, I decided to remove the east wye track and connect the stub ended locomotive track to the previous wye turnout creating 2 double-ended locomotive tracks.


Additional issue with original alignment was storage space. Two six-axle locomotive barely fit into their designated tracks. 

Given the original track arrangement in the yard, this change was very easy to accomplish and just require repositioning of existing roadbed and track. This took two evenings to accomplish. 


Realigned cork roadbed for extended locomotive tracks. 

Now yard capacity for power has increased alongside of operational efficiency. Helper sets returning from trips up the hill now make one move into the "helper pocket." With time, I hope this change proves to be beneficial for operations and Oakridge.


A three unit helper set sits waiting for its next run up the hill on the new rearrangement in Oakridge as the local switcher sits waits for its next assignment. 

Now that this change is out of the way terrain and base scenery can proceed into Oakridge in the coming weeks. 

Wednesday, April 8, 2020

Westfir Scenery

I have long considered Westfir to be the "first" scene on the railroad. For trains leaving Eugene, this is the first modeled location on the railroad, it is the first section of benchwork built, and is the first scene visible when viewing the layout in person. Now, it is the first section of the layout with any level of scenery. After finishing the upper level fascia and backdrops I turned my attention here, to Westfir, and finished the terrain, rockwork, and initial scenery layers: dirt, ballast, and gravel. 

I had started terrain efforts in Westfir previously, but the area remain unfinished. I began by reshaping the pick insulation foam that was already in place to make room for a layer of rock carvings. Gaps in terrain were covered with cardboard strips and contractor's paper. Seams and transitions were smoothed out with sculptamold. 


Reshaped terrain at Westfir.

With the base level of plater in place, I began adding rock cuts and outcroppings by hand carving plaster of paris. I worked in small batches, carving the rocks as the plaster hardened.


Second section of plaster freshly applied and ready to be carved. 


Rockwork on the far side of the scene complete.


Rocks were added around the tunnel for completeness. This took multiple small batches. 


In-progress plasterwork on whole scene. 

The end result was a bare white canvas. I began coloring the terrain with thinned brown craft paint. This color is not a perfect match to the final dirt layer, but is much better than bare white plaster should additional scenery layers become worn or scratched. The carved rocks were painted with gray, black, and brown craft paints using a combination of washes and dry-brushing.


Brown "dirt" paint applied. 


Rocks at tunnel painted. Was trying to go for a darker gray rock with sections of brown. Much of the color variation and detail is not picked up by the camera. 

Close-up of the Tunnel 22 rock cut. 


Rockwork at the opposite end of the scene which included two previously installed rock castings. 

Once the white plaster had been colored I added the base level of scenery, dirt texturing using powdered paints and plaster. Being the first time I have used this technique I struggled at first to know how thick I could make each layer of texturing but improved with time. Many of the vertical surfaces require the dirt to be blown into place. 


First layer of dirt texturing. I ended up applying 2-3 layers in some areas to build up the dirt to the appropriate depth. 

I dusted the rockwork with the dirt powder incorporating all the elements of the scene together. As this dried I began to apply ballast and gravel. I am using Arizona Rock and Minerals products throughout. All was secured in place with thinned white glue. 


Ballast and gravel applied around Tunnel 22. 


Westfir with completed "geology."

With this area finished I will continue on the other side of Tunnel 22 and bring that area to the same level of completion. Cardboard and paper terrain work has already commenced in that area. Stay tuned for more updates in the coming weeks. 

Sunday, April 5, 2020

Backdrops, Fascia, and Lighting

After sitting dormant for months, progress began again on the Cascade Subdivision due to unexpected time at home given the situation across the country. Normally work sessions are only 1-2 weeks in length and result in a very concentrated and focused effort on a few projects. With these new circumstances I have been able to take a much more relaxed approach and dive into multiple long-term projects at once. 

15 Minutes a Day:
In the course of the last year I listened to a podcast featuring Bob Fallowfield and his Galt Subdivision, a beautiful CP themed layout. Bob's railroad is nearly if not fully finished and detailed and a good amount of the podcast's discussion centered on this anomaly: a finished model railroad! Bob's secret to progress is always aiming for at least 15 minutes of progress each day. With time, these smaller amount of time build into something significant, and this principle has been foundational in guiding my efforts thus far. Most times I will work for at least 45 minutes on a project, sometimes up to a couple of hours either in one sitting or multiple 15-20 minute chunks throughout the day. It is not magic, more a matter of having a vision and sticking to it, but Fallowfield's Fifteen have worked!

Fascia and Backdrops:
With limited time in general to work on this railroad a major priority has always been achieving a "finished" look and feel even if the railroad itself is not technically fishined. Major elements in the visual completion include the painting of backdrops and installation of fascia. With the completion of trackwork on the mainline I could now start "finishing" the upper level of the railroad. I began with backdrop painting. This process has been well documented throughout my blog postings and a timelapse video of that project can be found HERE. I have now completed the backdrops for the entirety of the railroad, save for one small stretch. 

Concurrently, I began to install the fascia on the upper level starting with the layout entrance. Given my benchwork construction, this was not a straightforward installation, but involved a good deal of fitting and fiddling. Nevertheless when this area is completed fully with paint and terrain it will provide a unique entrance to the railroad.


Beginning efforts on the fascia near the entrance to the railroad. The major challenge was incorporating the middle level duck-under as it sits in the middle of a tunnel.  


My solution for the tunnel and duck-under situation can be seen above. This setup allows for the scenes to be viewed from the inside of the tunnel should one choose. 


Both fascia and backdrop progress can be seen in the above photo.


Backdrops painted at Cascade Summit. With the terrain "horizon" painted I have begun to start visualizing the dramatic mountain scenery that will be featured on this upper level. 


Fascia and backdrops at the west end of Fields. This scene is very deep with almost 24" of railroad between the fascia and backdrop. The upper level fascia helps to separate the two levels of the railroad. 


Fields above and Westfir below with Klamath Falls staging at the top.

Lighting: 
Time has allowed for the start of terrain work to begin on the lower level. In the coming weeks I will begin completing the terrain, rockwork, gravel, dirt, and roads on the lower level. I felt that it was necessary to first install the between deck LED lighting in order to achieve the correct colors and not work in shadows. 

I am using LED strip lights from MicroMark and a 12V DC power supply. Installation of these lights has been very painless. I've mounted the lights onto foamboard strips and in turn mounted those to the underside of the benchwork. The light is even and bright, illuminating the layout in a very pleasant and natural way. 


Lights installed under Fields illuminating Tunnel 22 at Westfir. 


Installation of the lights was a quick process. The above photo shows the lights on the foamboard strips mounted on the underside of the upper level benchwork. 


Photo showing how the combination of fascia and lights contributes to the finished look of the railroad.


Westfir illuminated and ready for the start of scenery. Future posts will detail my scenery efforts on this stretch of railroad.

More to come in the next few weeks. I hope everyone is safe and sound in these trying times. More than ever I am thankful for this community!